POS Feature Documentation
Overview
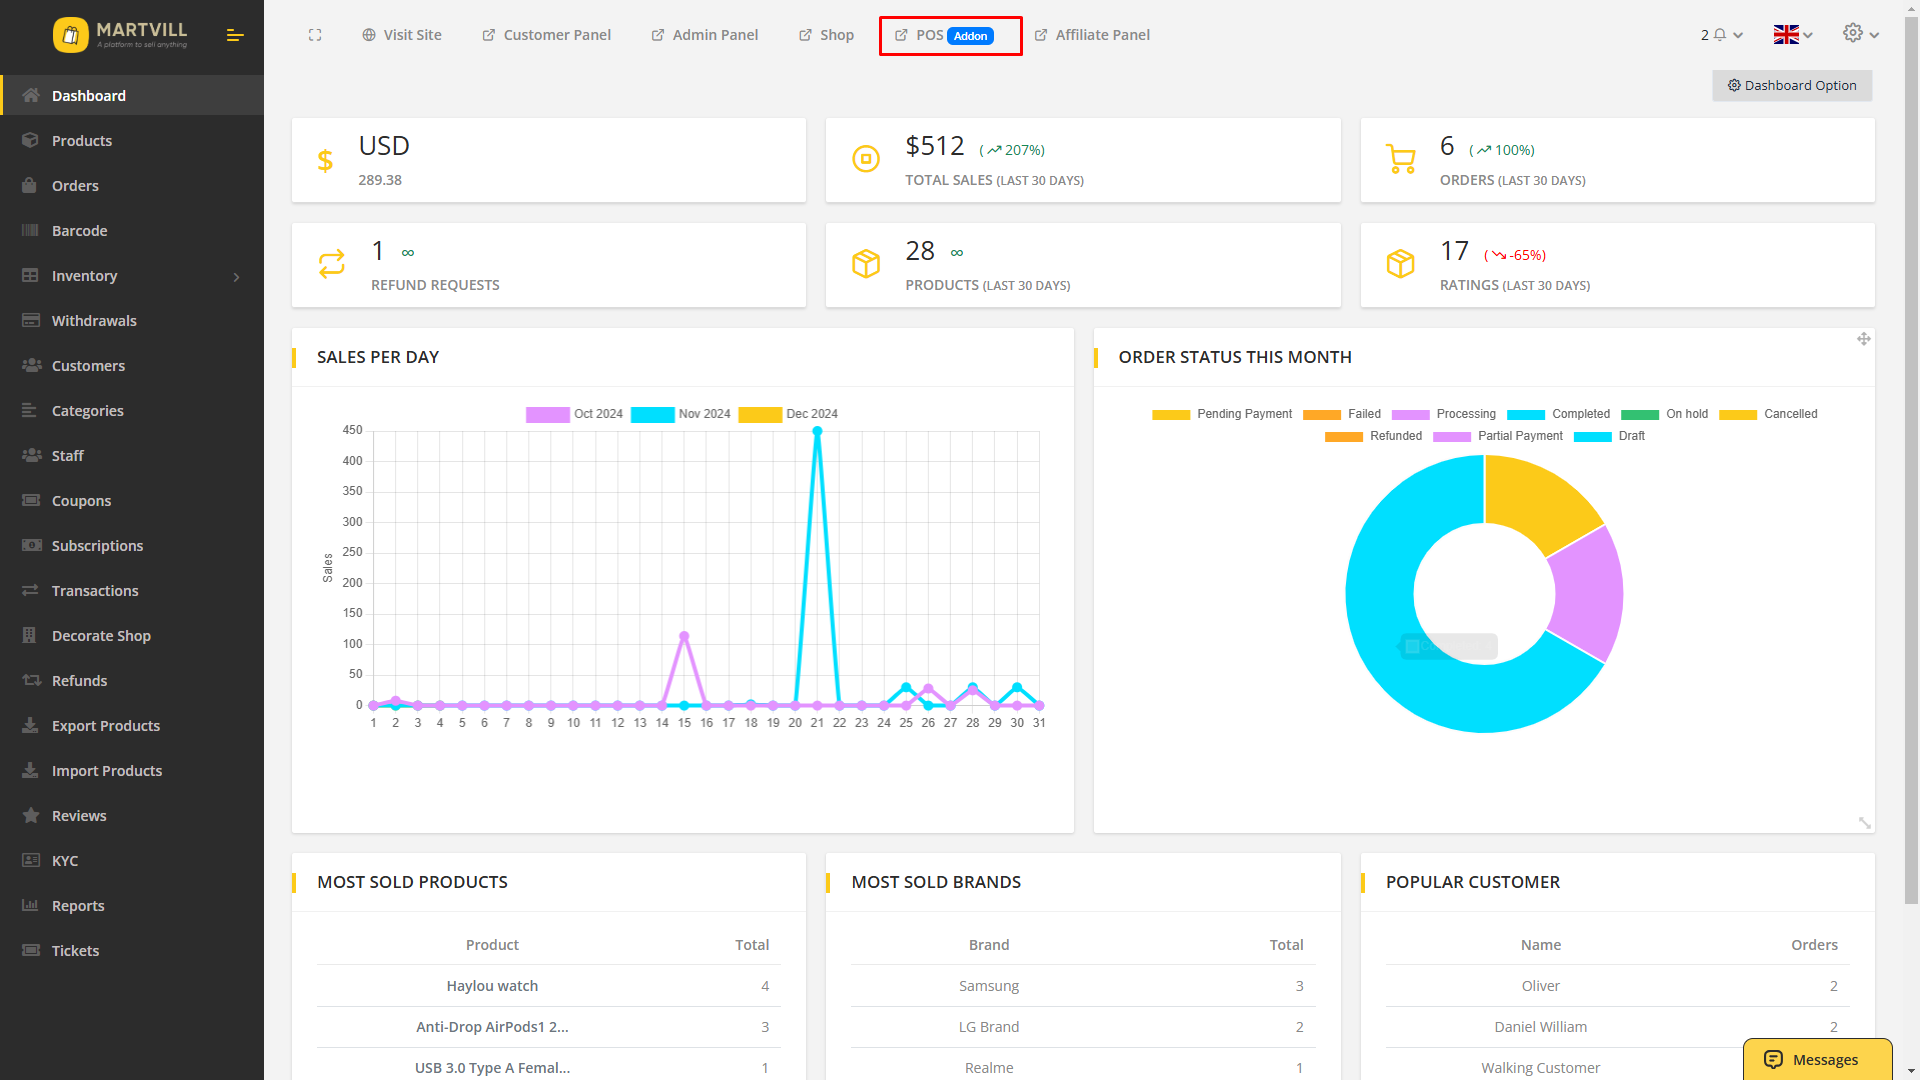
The POS feature is accessible to Vendor and Admin type users. A link to the POS system is available in the header of both the Vendor and Admin panels for easy access.
Admin POS Settings
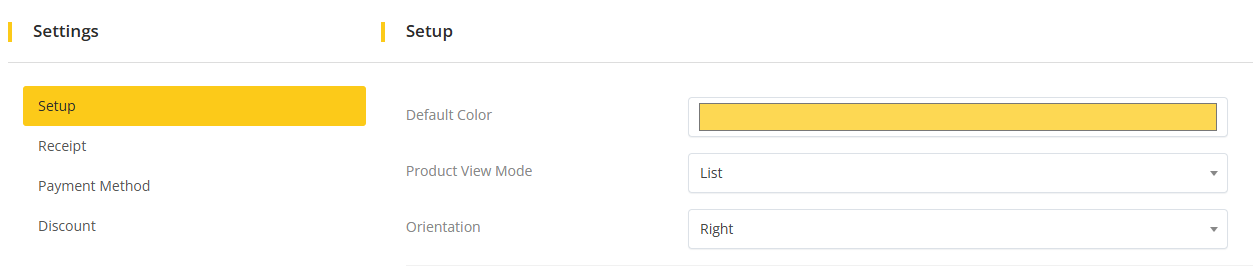
The admin can configure the default POS setup settings where the admin is able to configure the default color for POS module. The default POS color can further be configured by the vendor for his own POS panel. The admin can also set the default POS panel product view mode which can be further configured by the vendor. The admin can also configure the default orientation of the POS panel and it is also configurable by the vendor for his own POS panel. The admin can also configure if multi-terminal is enabled for the POS module. If the configuration for multi-terminal is enabled then the vendor will be able to create multiple terminal and if the settings is not enabled then the vendors will not be able to create multiple terminals for his POS panel. The admin can also configure if the staffs of vendor can access the POS panel, if it is necessary to provide terminal PIN to access the terminals of POS module, if discount can be implemented on the POS panel, if Recaptcha is enabled for POS panel and if OTP is enabled for registration on POS panel. If admin configures that the discount is enabled for POS panel then the vendor can further configure the discount settings for their own POS panel.
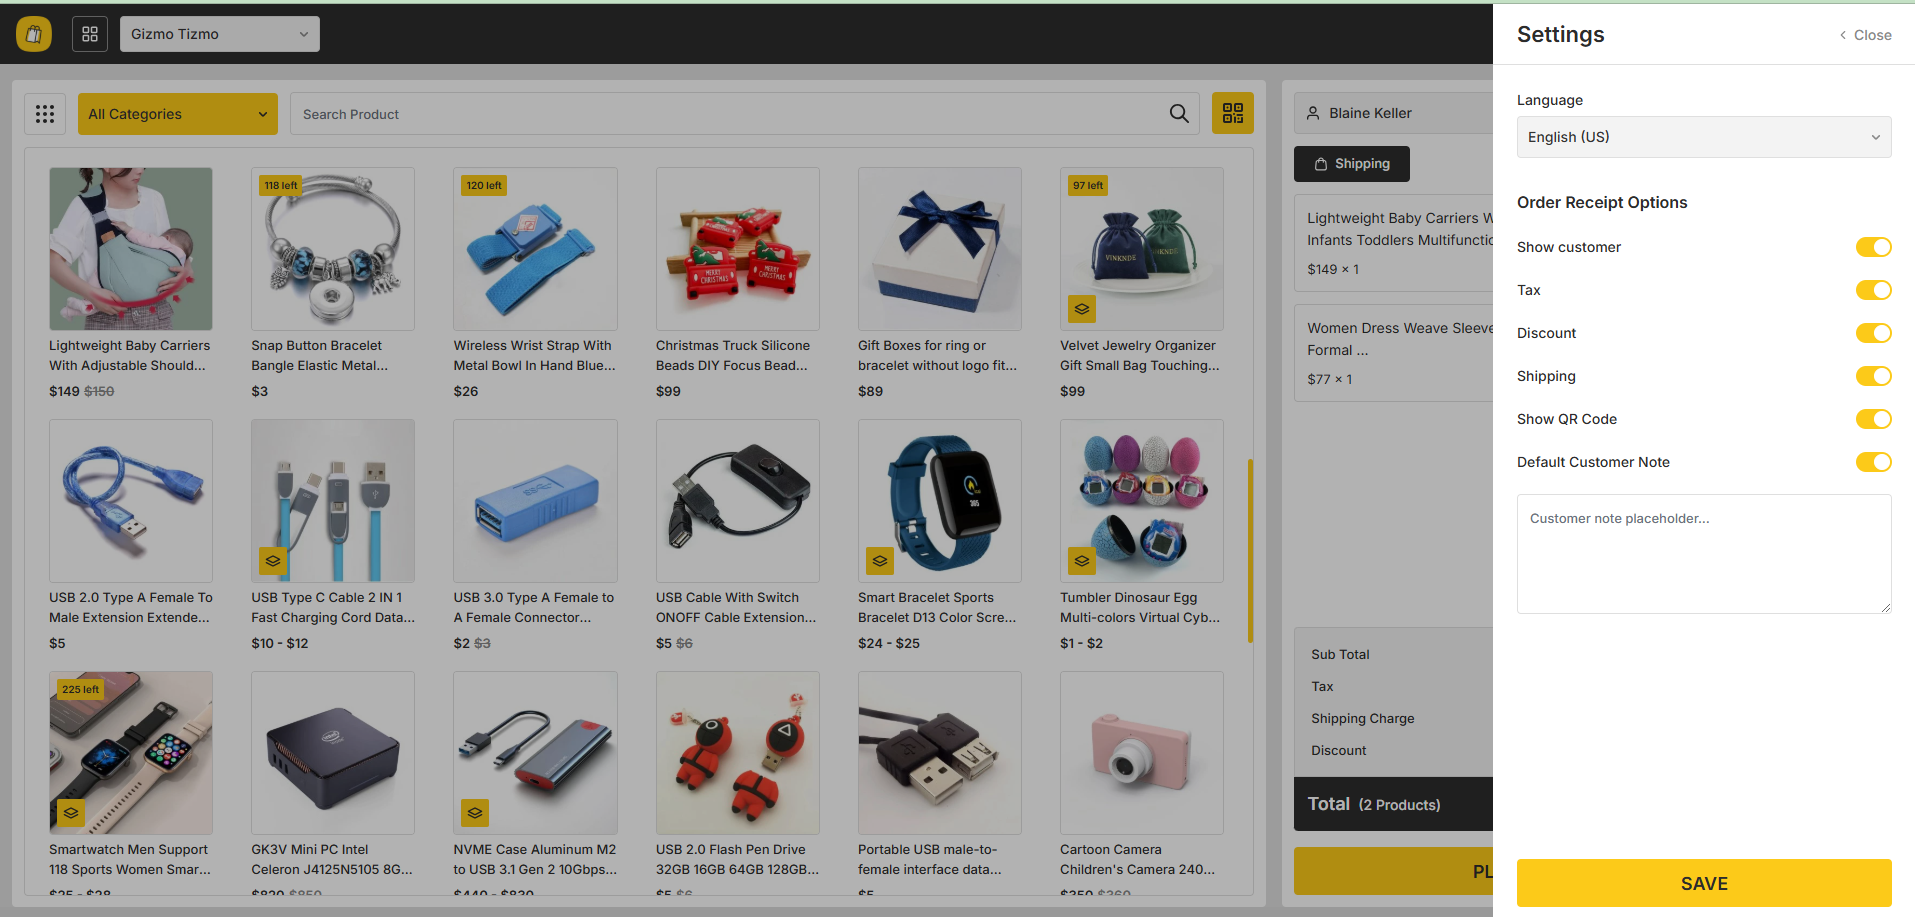
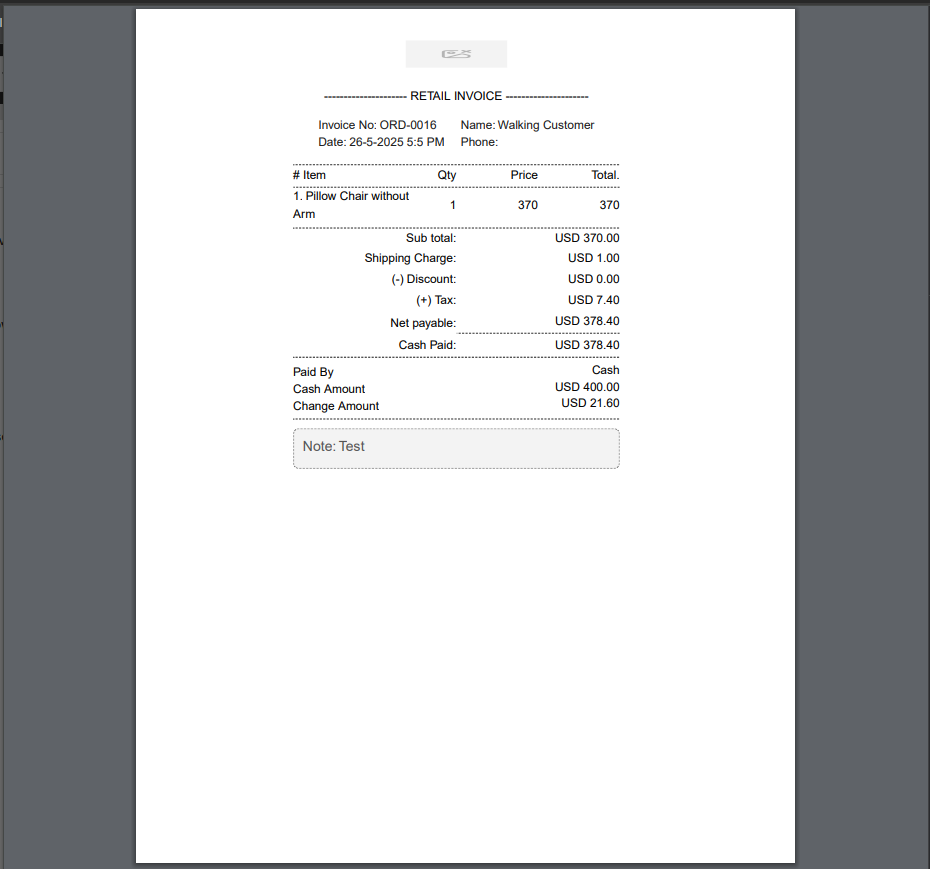
The admin can configure the default receipt settings for the POS module which can further be configure by individual vendors to be applied on their own POS module. If the vendors do not make any necessary changes on the receipt from their end then the default settings configured by the admin will be applied as the settings for POS for the entire system. On the receipt settings, the admin can configure the logo, header and footer text, can configure if the customer info is to be displayed or not, if the tax amount is to be displayed or not, if the shipping rates is to be displayed or not and if the discount amount of an order will be displayed on the receipt or not. If any of the settings is configured as no then those settings will not be displayed on the vendor receipt settings. Only the allowed settings by the admin can further be configured by the vendor.
The vendor gets an additional input field where they can provide a default note which will be displayed on the receipt. This default note is stored as default on the POS panel and the vendor/staff can update the default note as per their preference from the POS panel also.
The admin can further configure the fields which are displayed when a vendor/staff tries to onboard/register a user from the POS panel. The admin can select the visibility and set the field as required. Based on the settings the fields will be displayed when a new user is to be registered from the POS panel.
The admin can also select the available payment methods that will be available on the POS module. The vendor can select payment methods from the allowed ones by the admin and those specific payment methods will be displayed on his POS panel.
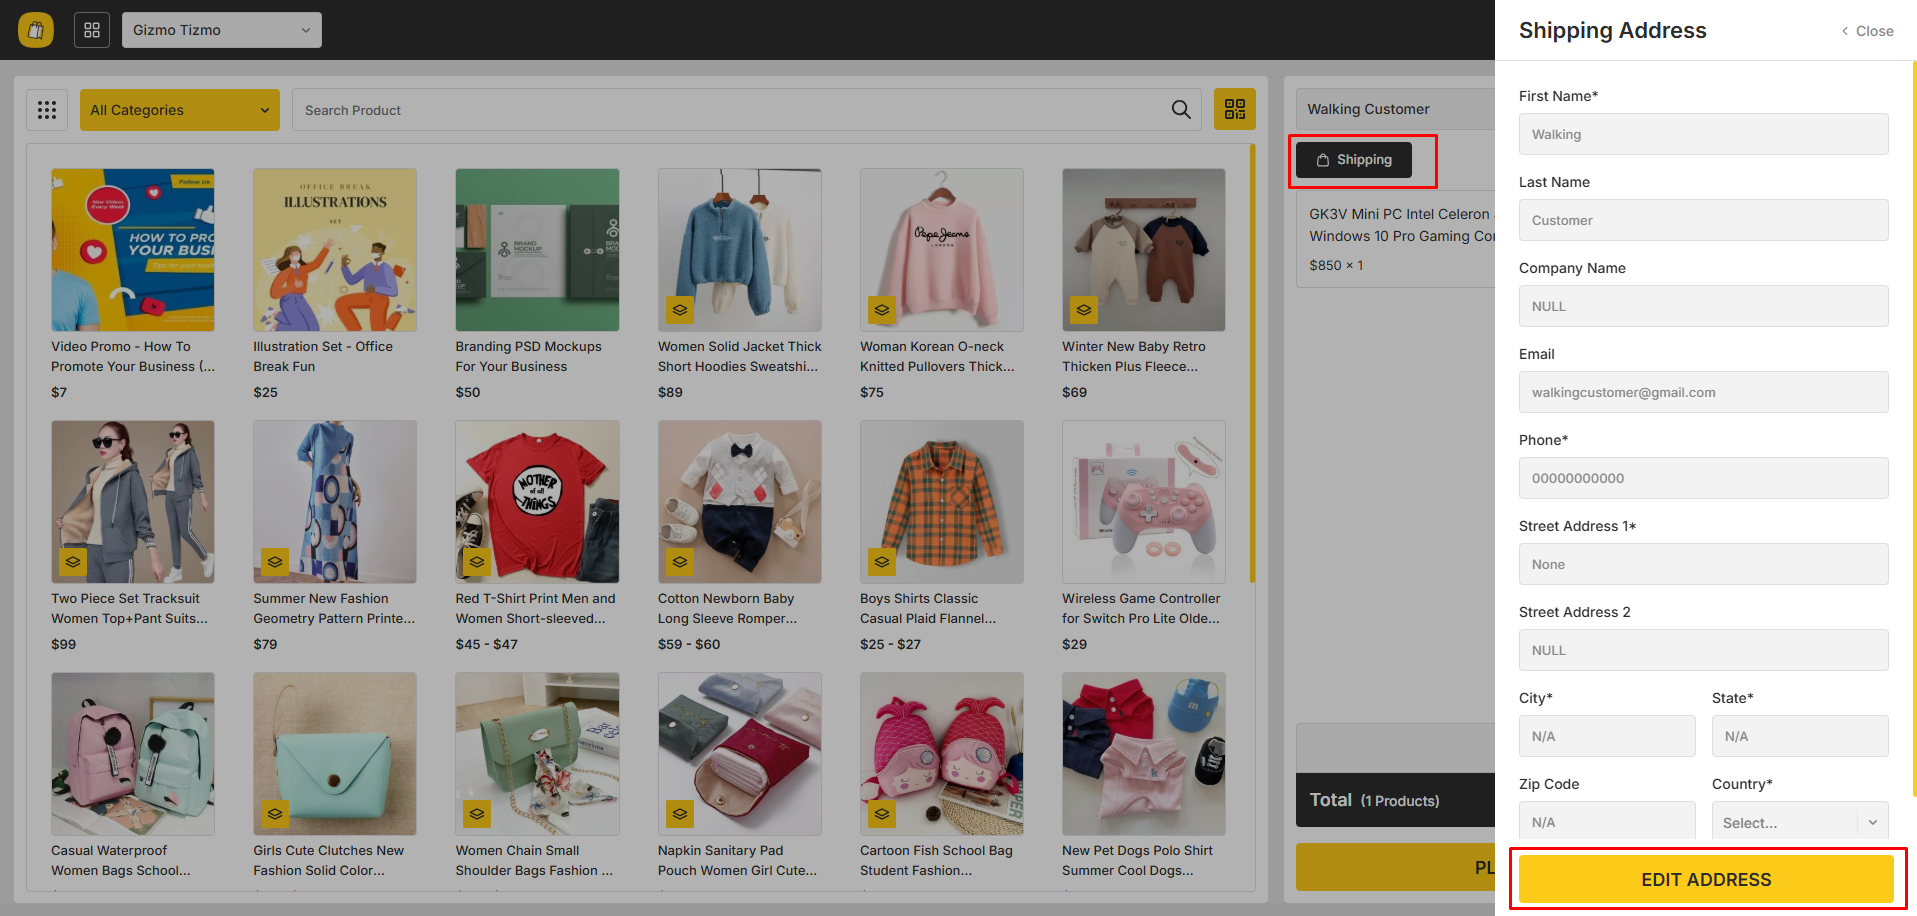
The admin can also select the input fields which will be displayed on the POS panel whenever a new shipping address is to be created from the POS panel. The admin can configure the visibility of those shipping input fields and set them as required as per his preference and based on the configuration the shipping address input fields will be displayed on the POS panel.
Vendor POS Settings
The vendor can change the default POS panel color from his end. The vendor can also select the product view mode and orientation according to his preference which will be applied to his POS panel.
The vendor can configure the receipt settings as per his preference on the settings configured by the admin. The admin can additionally provide a default note which will be stored as default for every purchase made from his POS panel. However, the default note can be changed from the POS panel by the vendor or staff.
The vendor can select the available payment methods for his POS panel from the allowed methods that is configured by the admin. The specific payment methods which are selected by the vendor will be allowed on their specific POS panel.
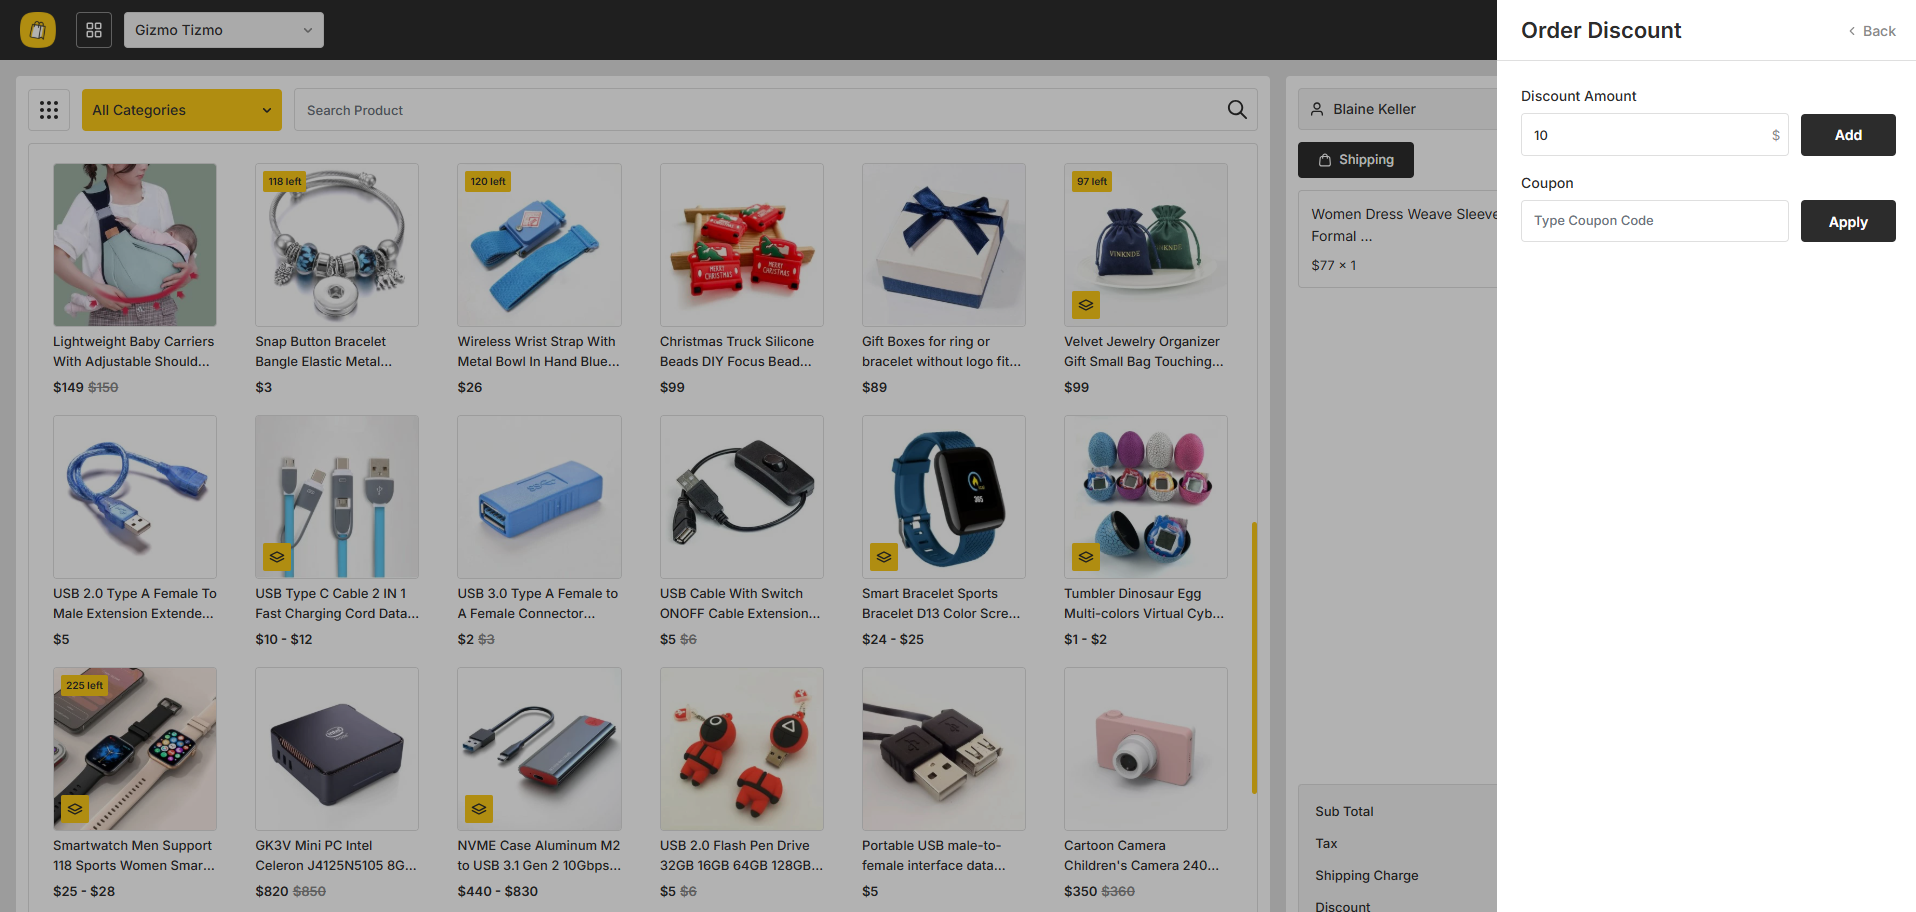
If discount is enabled then the vendor can configure the discount settings for his POS panel. The vendor can select if he wants the coupon to be enabled on his POS panel, configure if he wants custom discount to be enabled for his POS panel and can even configure if he wants to multiple coupons to be applied on a single purchase or not.
Terminal Settings
On the terminal menu, the vendor will be able to see all the available terminals for his POS panel. The vendor can edit or delete the terminal from the terminal list. The vendor can filter the terminal list through keywords or staff. The vendor can add additional terminals if multiple terminals settings is enabled by the admin. In order to add a new terminal the vendor has to click on the Add New button which will open a new form to add a new terminal. In the form, the vendor has to provide a terminal name, add staffs for that terminal, select a location for a terminal, provide PIN to access the terminal and select status for that terminal.
Order List Operations
The vendor can see all the orders made from POS on the order list where the vendor can see the customer who made the order, the staff through whom the order was made, the terminal through which the order was placed and other things. The vendor can also filter the order list using keywords, staff and terminal.

Staff Activities Operations
On the staff activities menu, the vendor will be able to see the activities on the POS panel. The vendor will be able to check the activities on a session base. The vendor will be able to check each individual staff sessions and the terminal they have worked on along with the total number of orders from that session. The vendor can also filter the list using staff and terminal.

POS panel operations
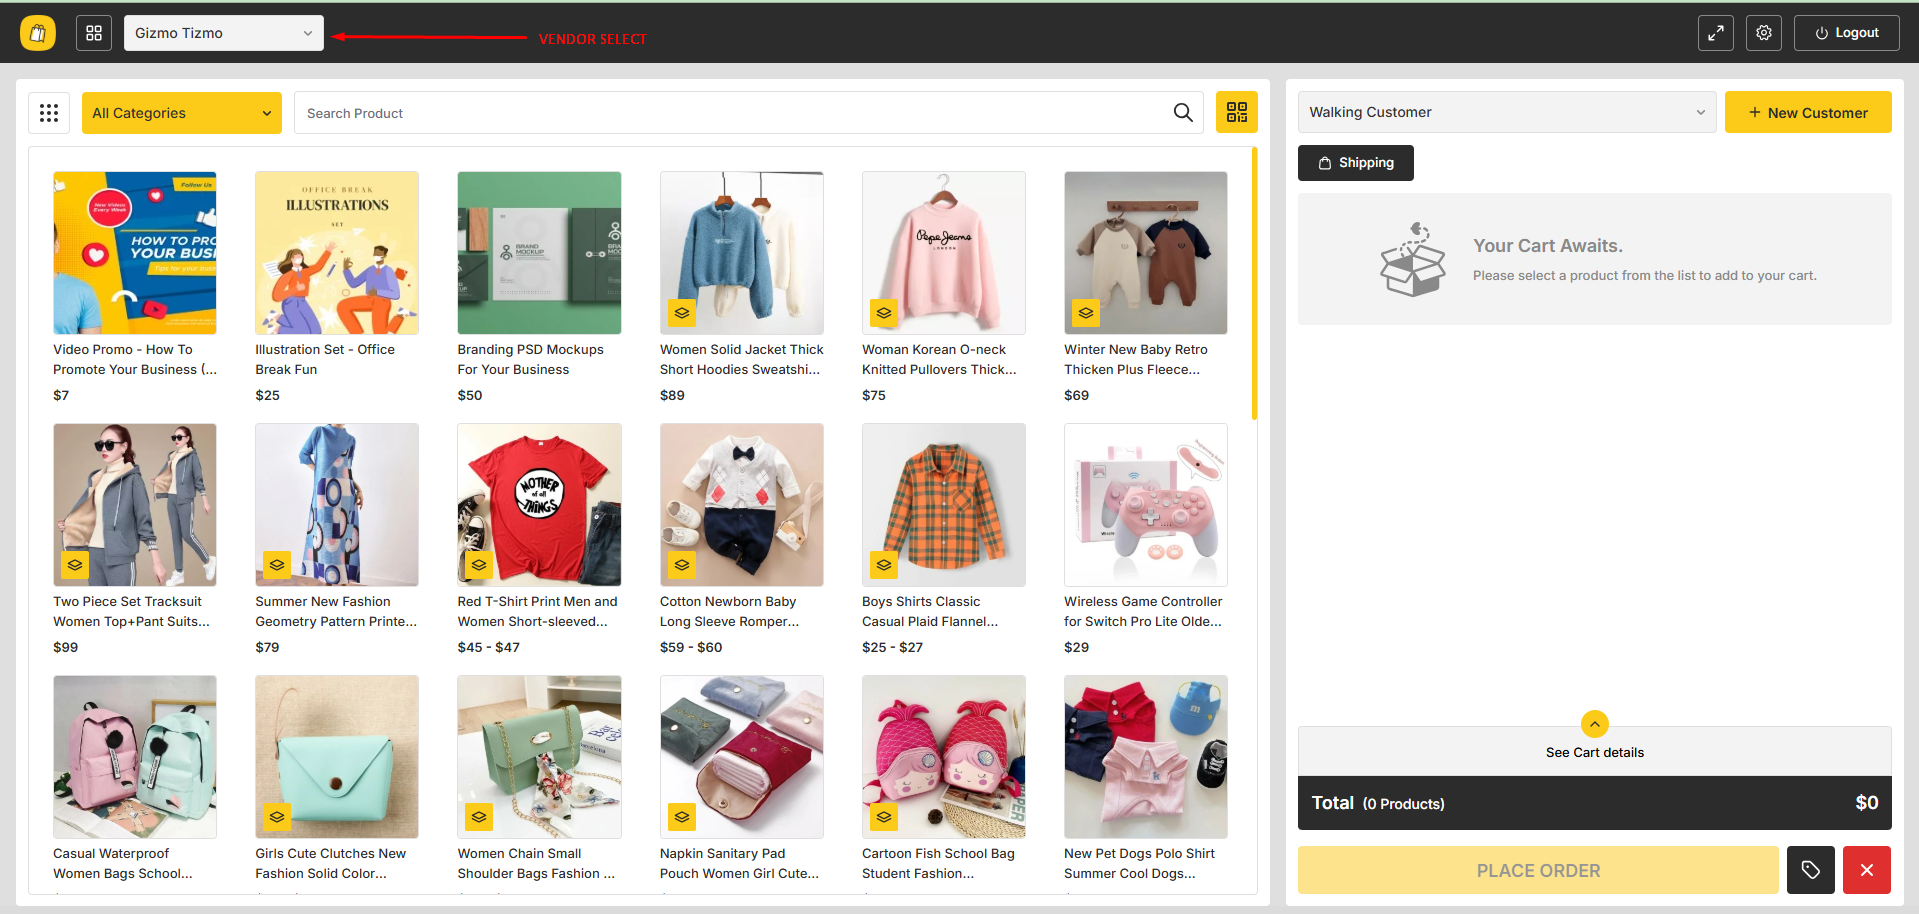
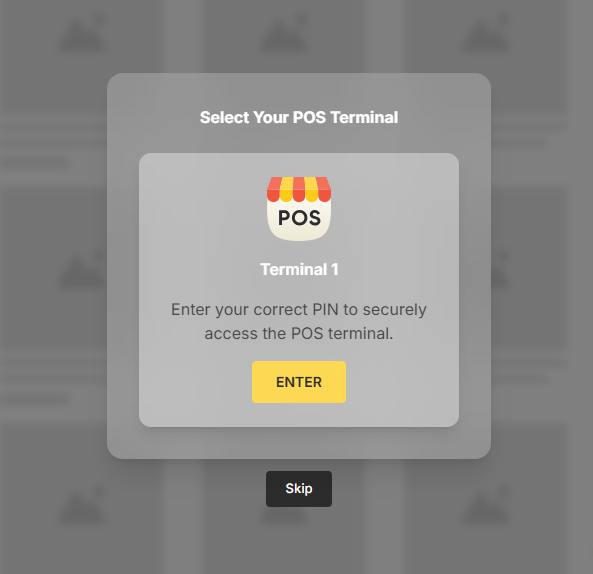
The super admin can access the POS panel and if his vendor profile has any terminal then he will be able to see the available terminals while accessing the POS panel. He can skip the terminal access page if he wants. However, if the super admin access the POS panel through terminal then he can only see the available products for that specific location which is assigned for the terminal he can accessed into. And if he access the POS panel without any terminal then he can switch to any vendor and any location as per his preference.
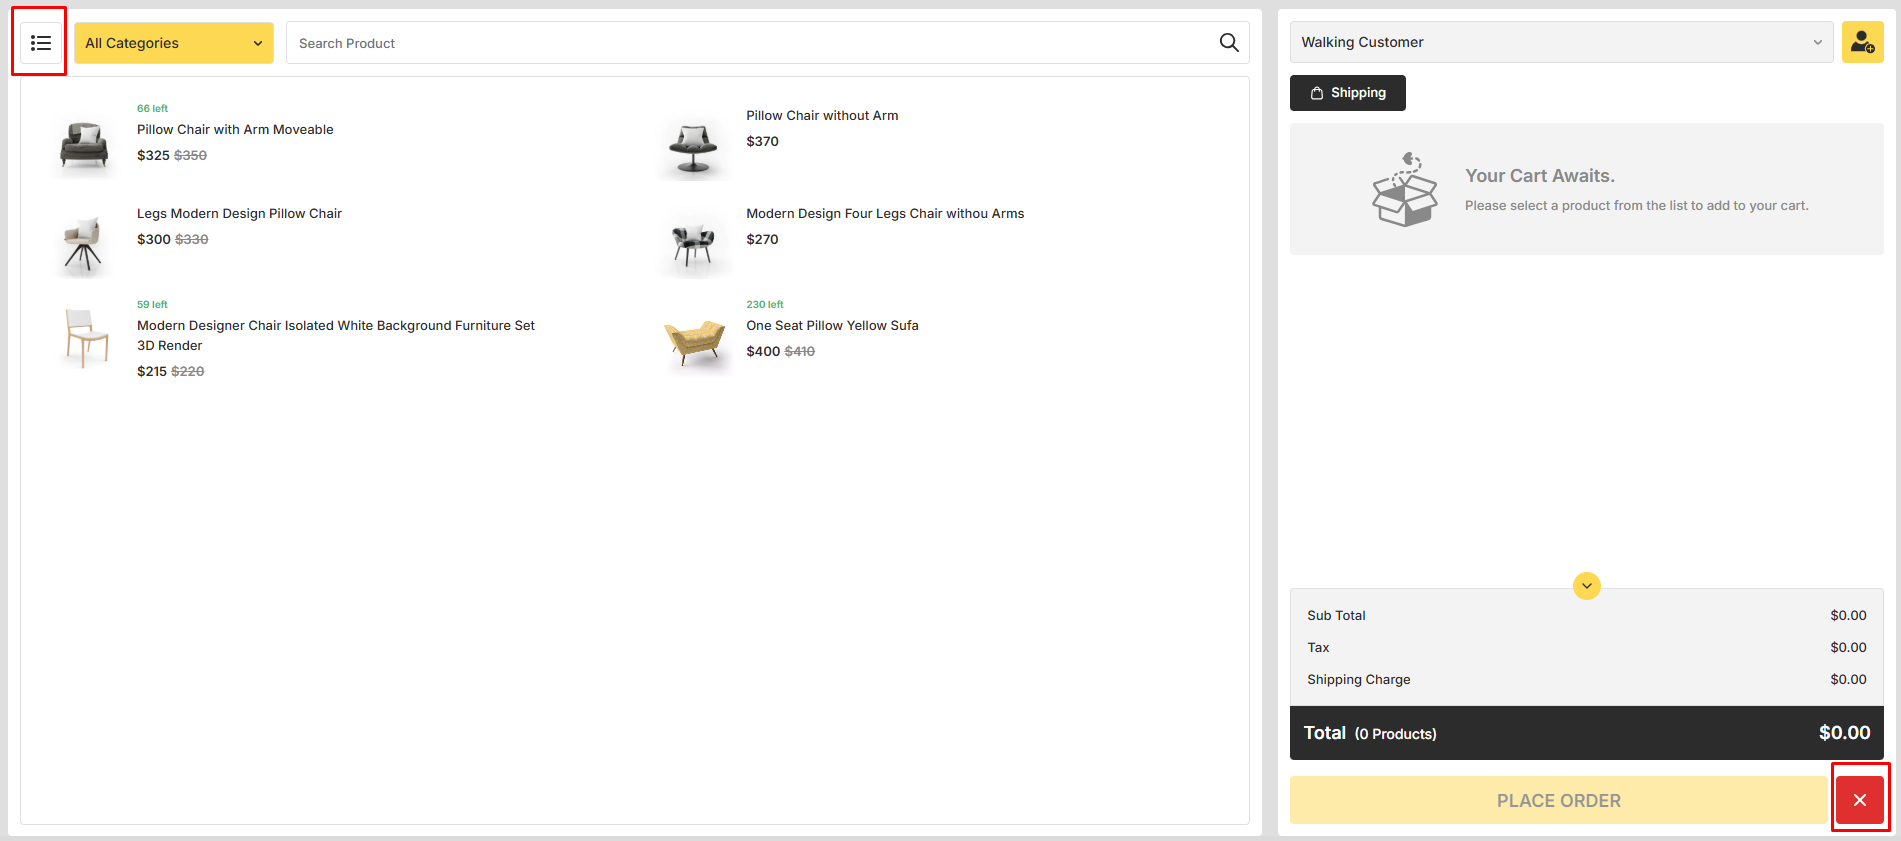
Once an admin access the POS panel without any terminal then all the products available in the system will be displayed. The admin can select a vendor and location as per his preference.
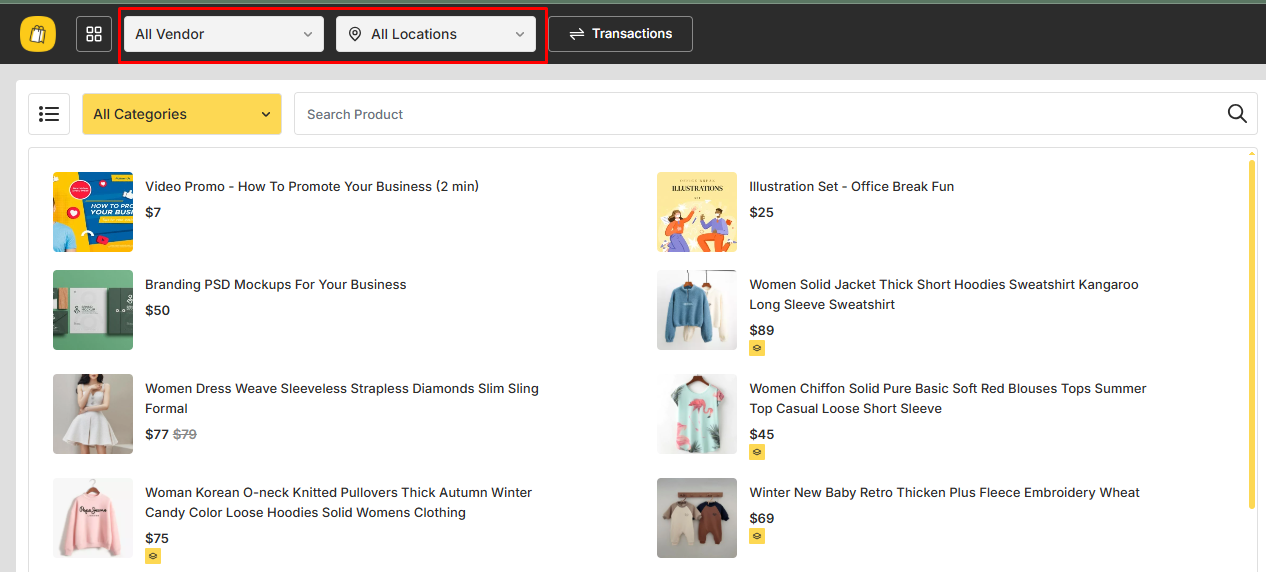
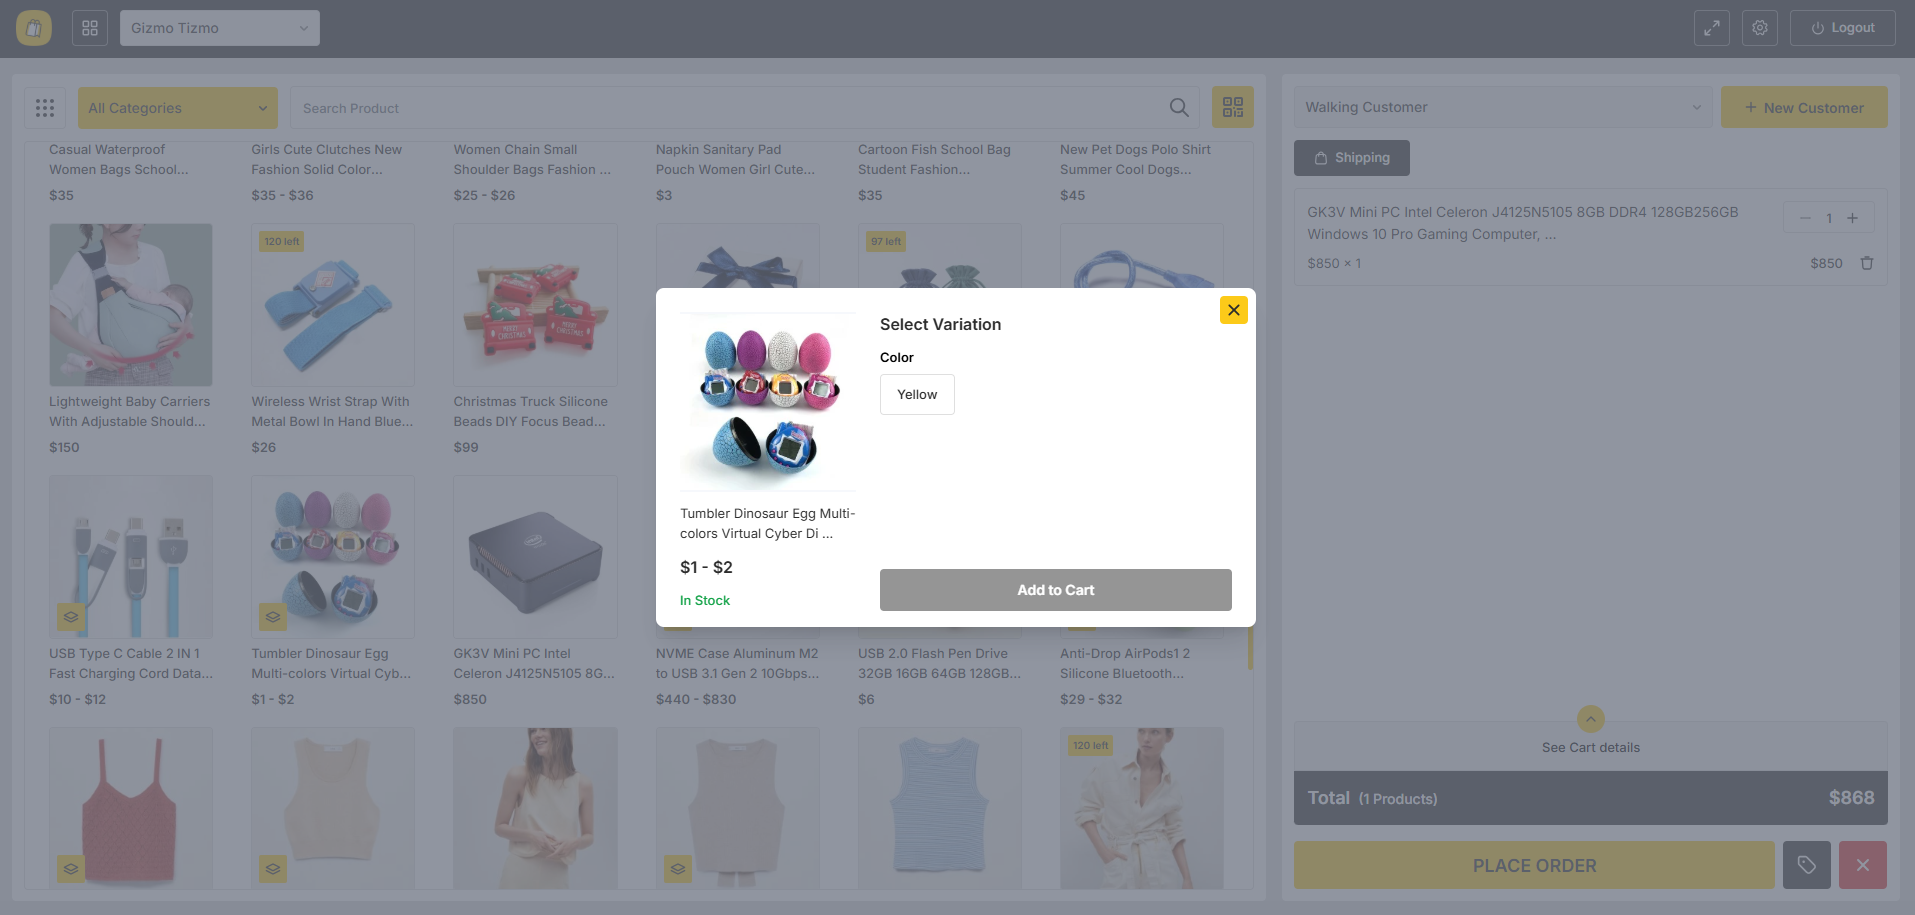
Once an admin select a vendor and a location the product list will be filtered based on the selected location. The available categories will also be filtered based on the product list on that specific location. The admin can search the product from the product list and can add the product to the cart for an order by just clicking on the product. If a product is added on the cart by the admin for a vendor then if the admin switches the location of the vendor or changes the vendor the cart will be reset and turned empty.
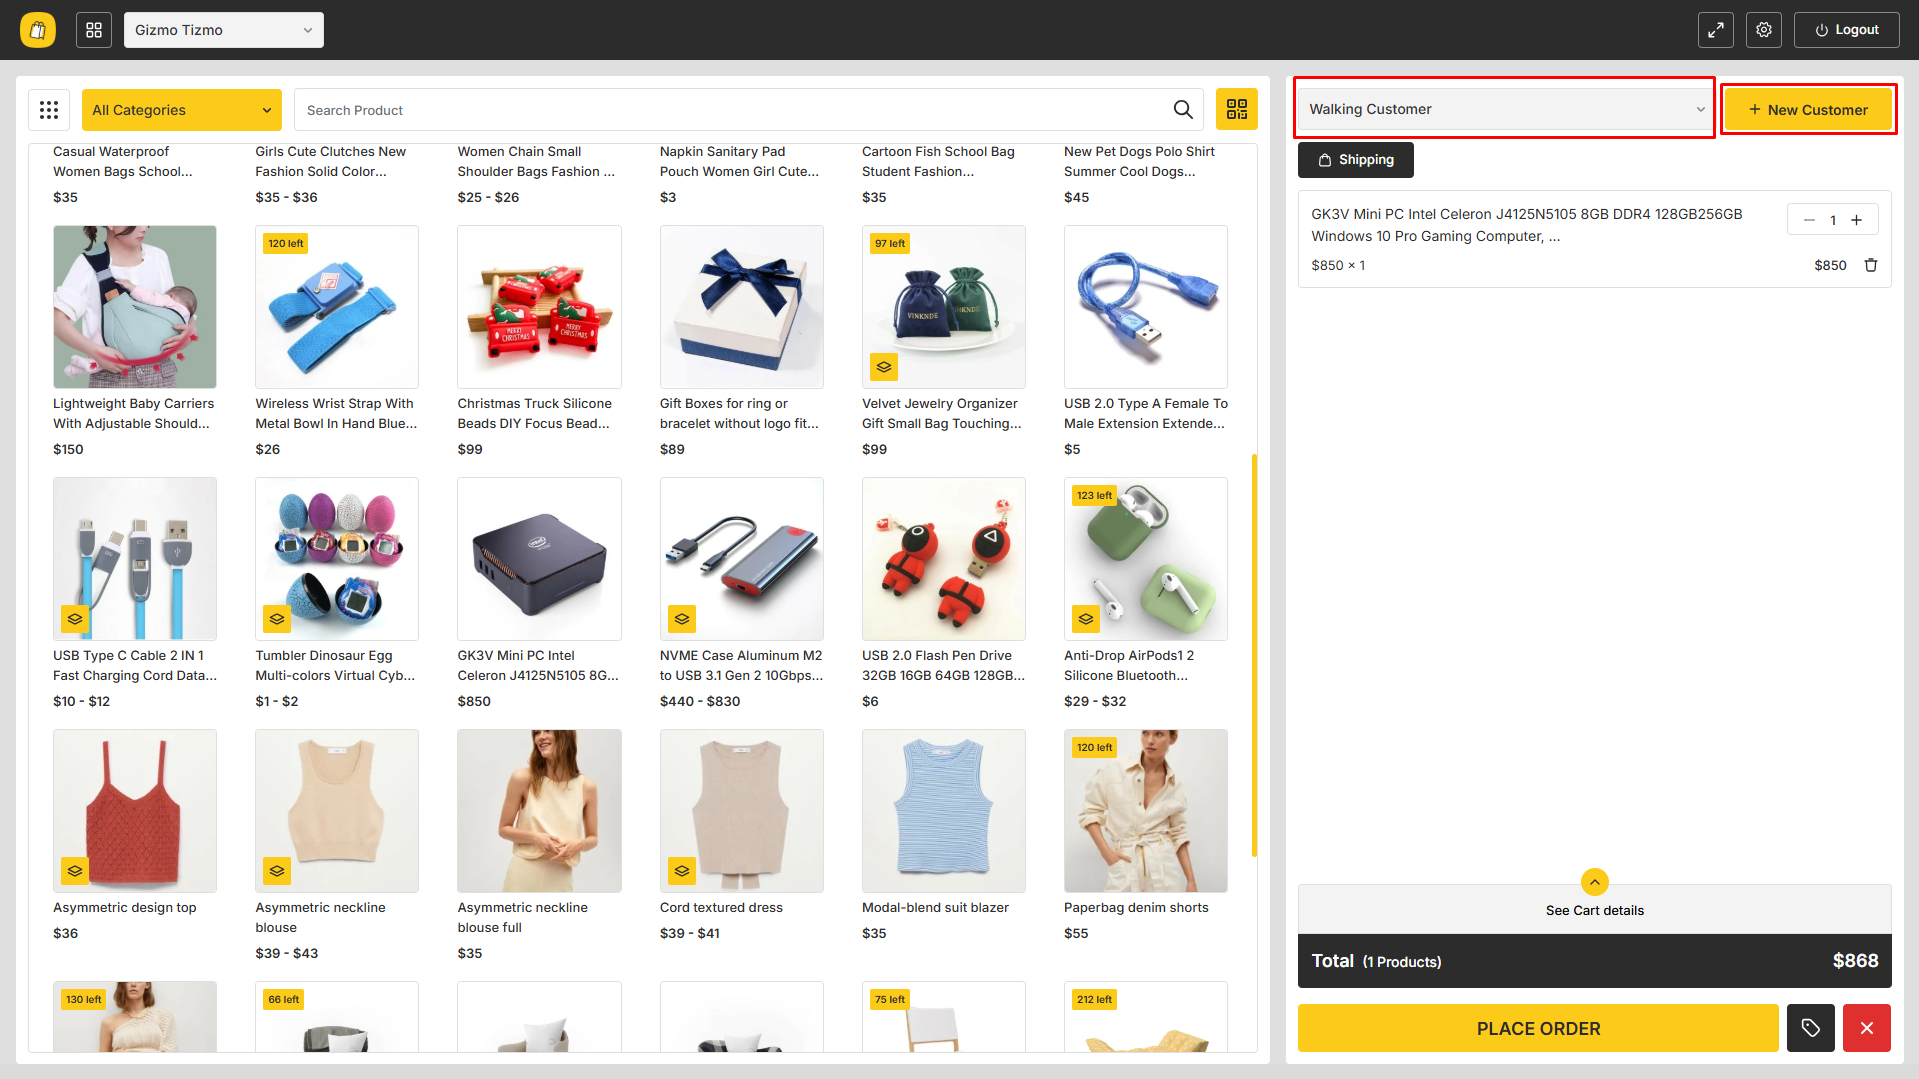
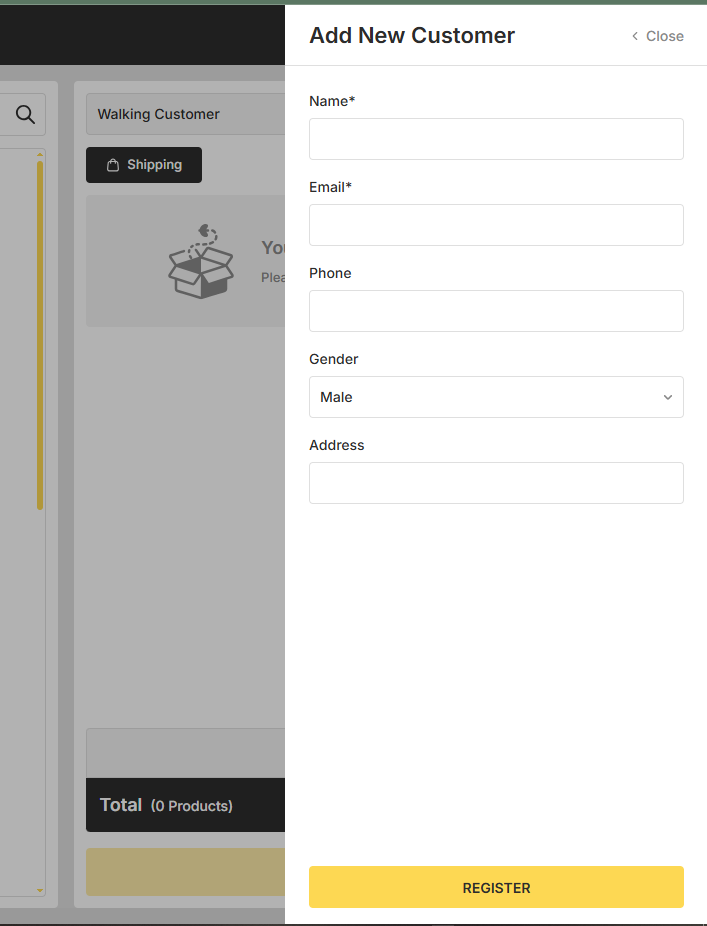
The admin can add a new customer also by clicking on the add button icon. Once the form opens the admin has to provide the necessary information and the will be created accordingly. If any verification is allowed as per the configuration then the verification will be applied also.
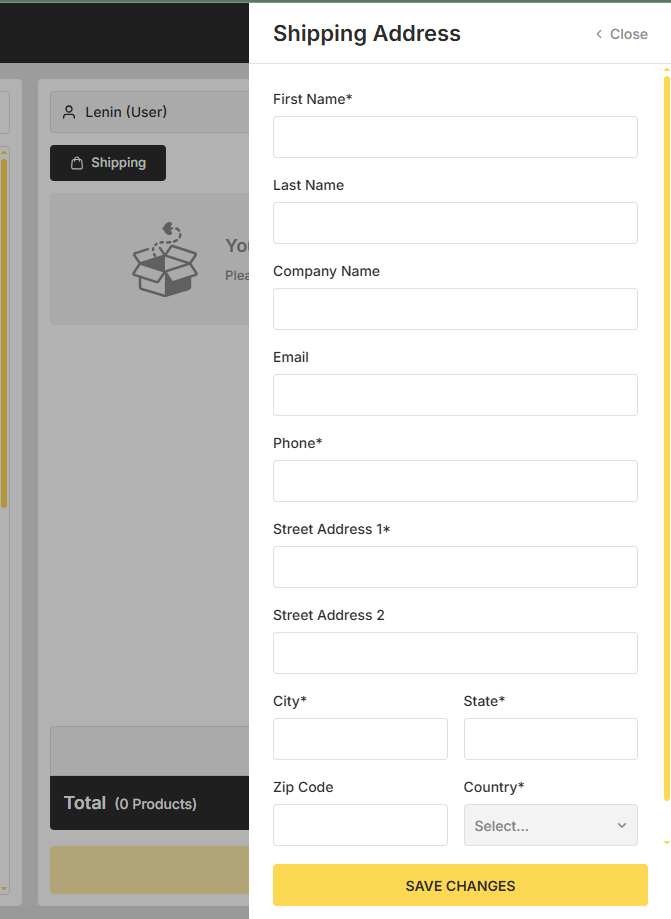
After a new customer is created the admin can add a shipping address for the newly created customer by clicking on the shipping button which will open a shipping address creation form. After the address is created the admin can edit the address and can even add new address as well.
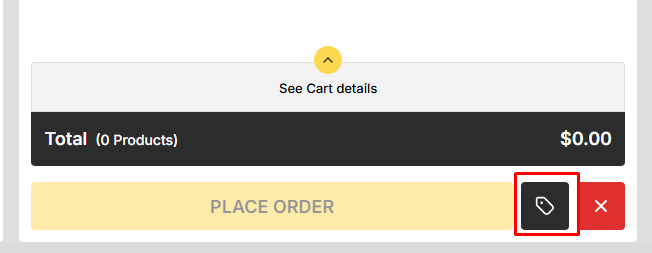
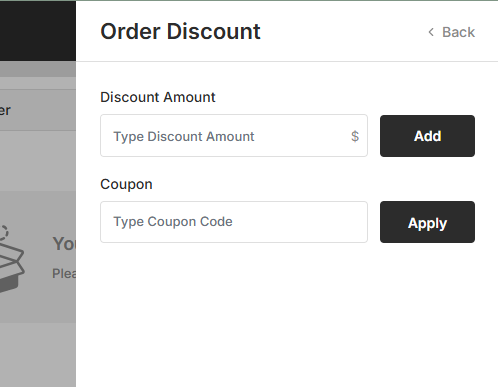
The admin can even add a discount by clicking on the discount option during an order.
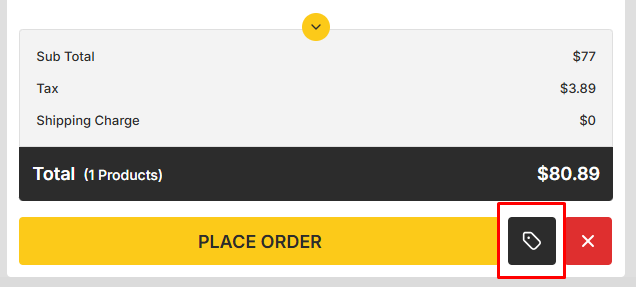
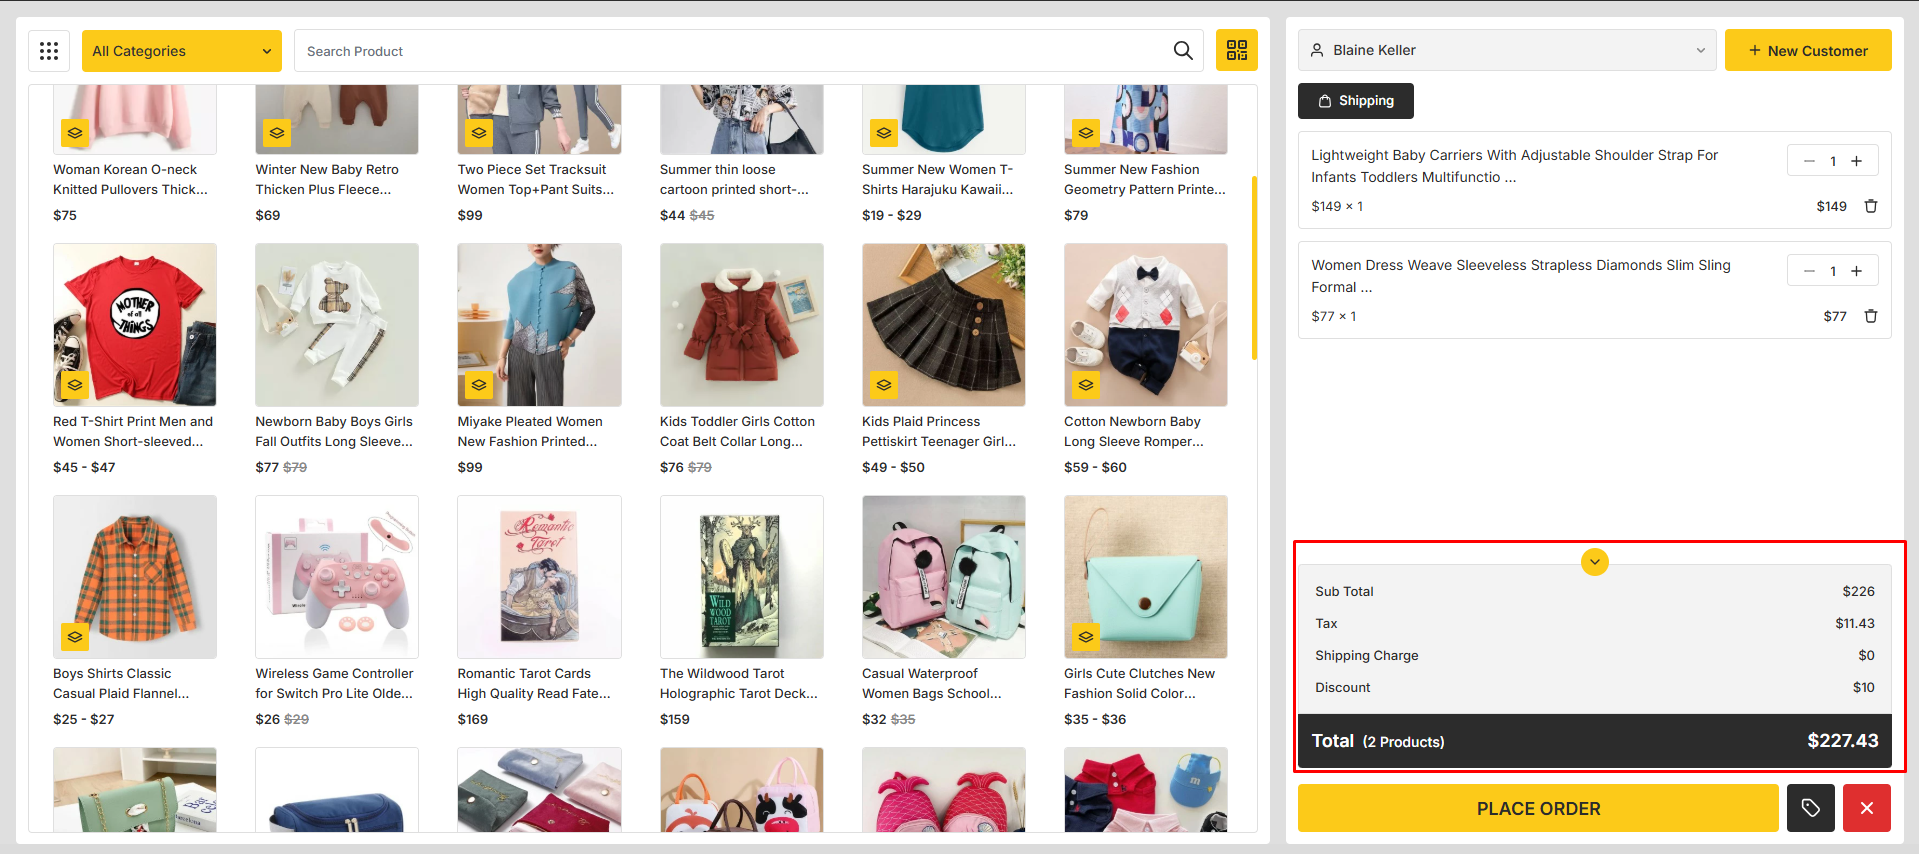
Once a product is added on cart the related shipping and tax calculation for that product will be automatically displayed based on the selected product.
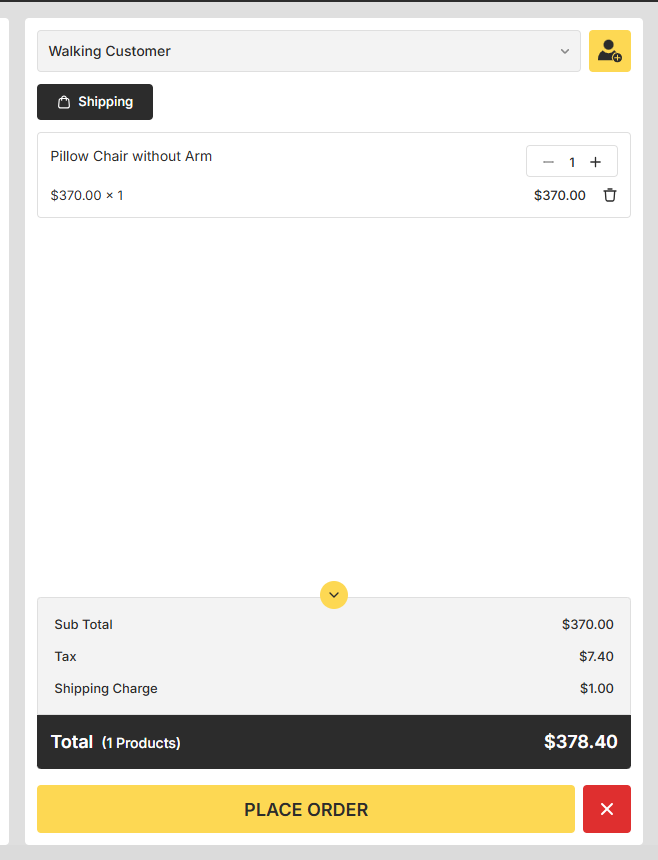
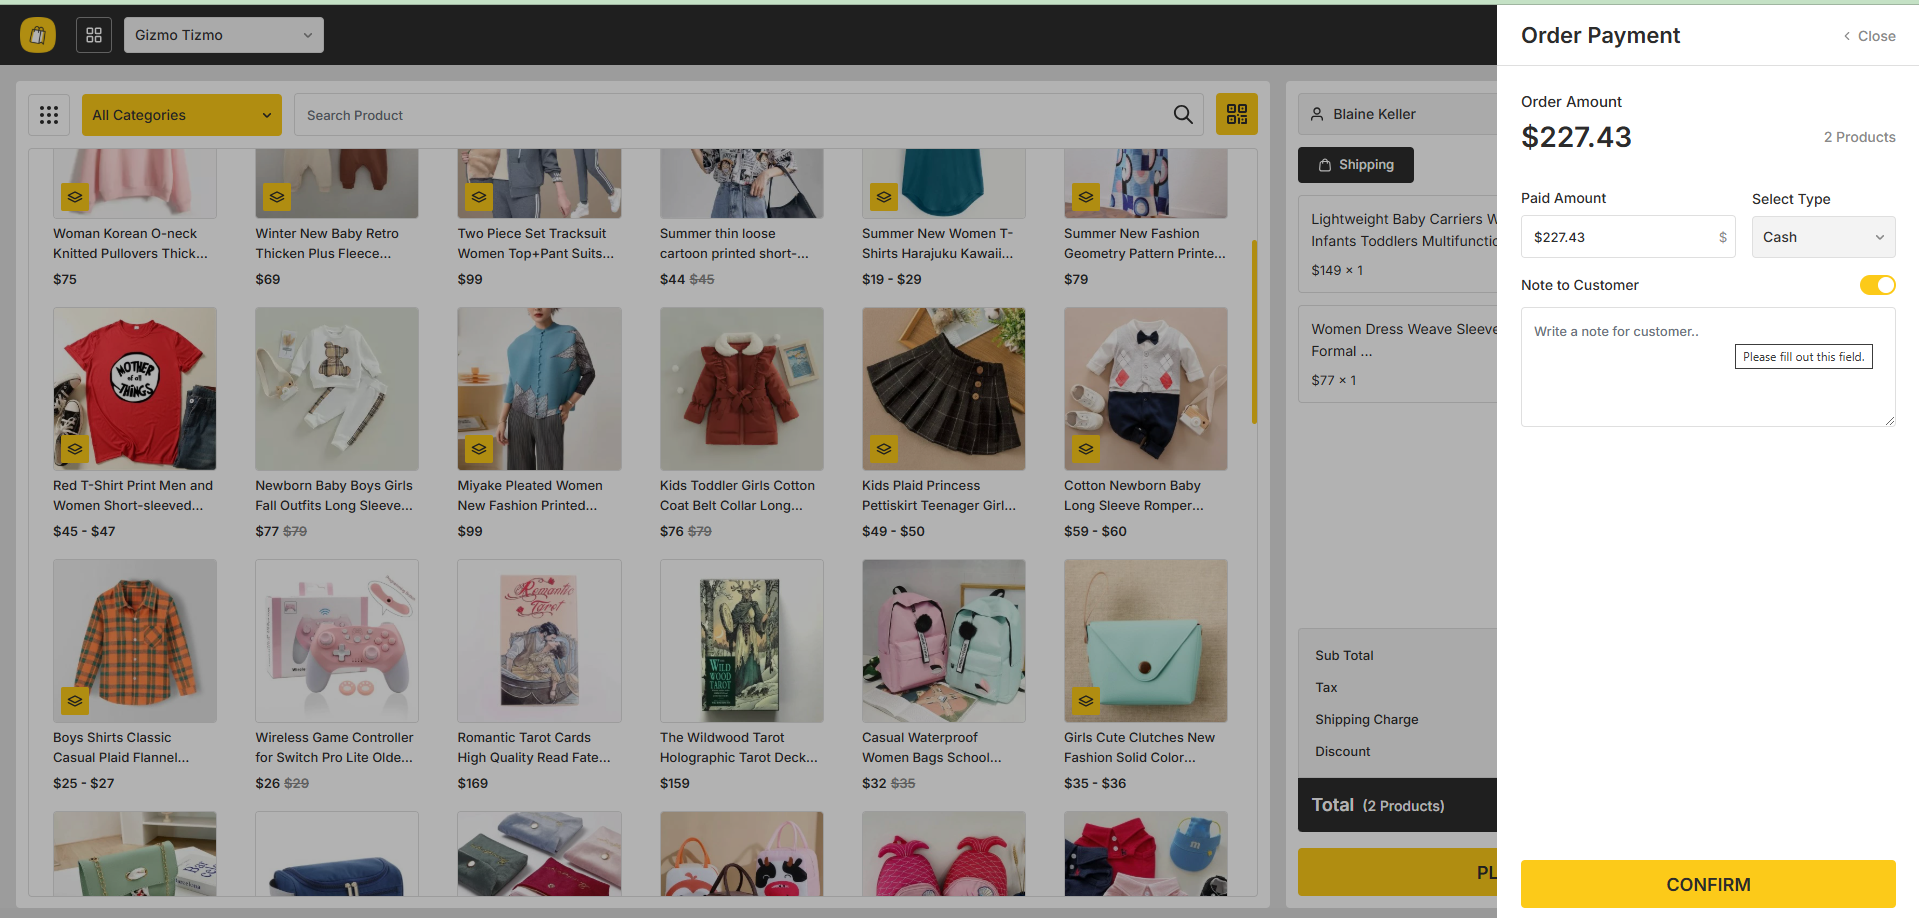
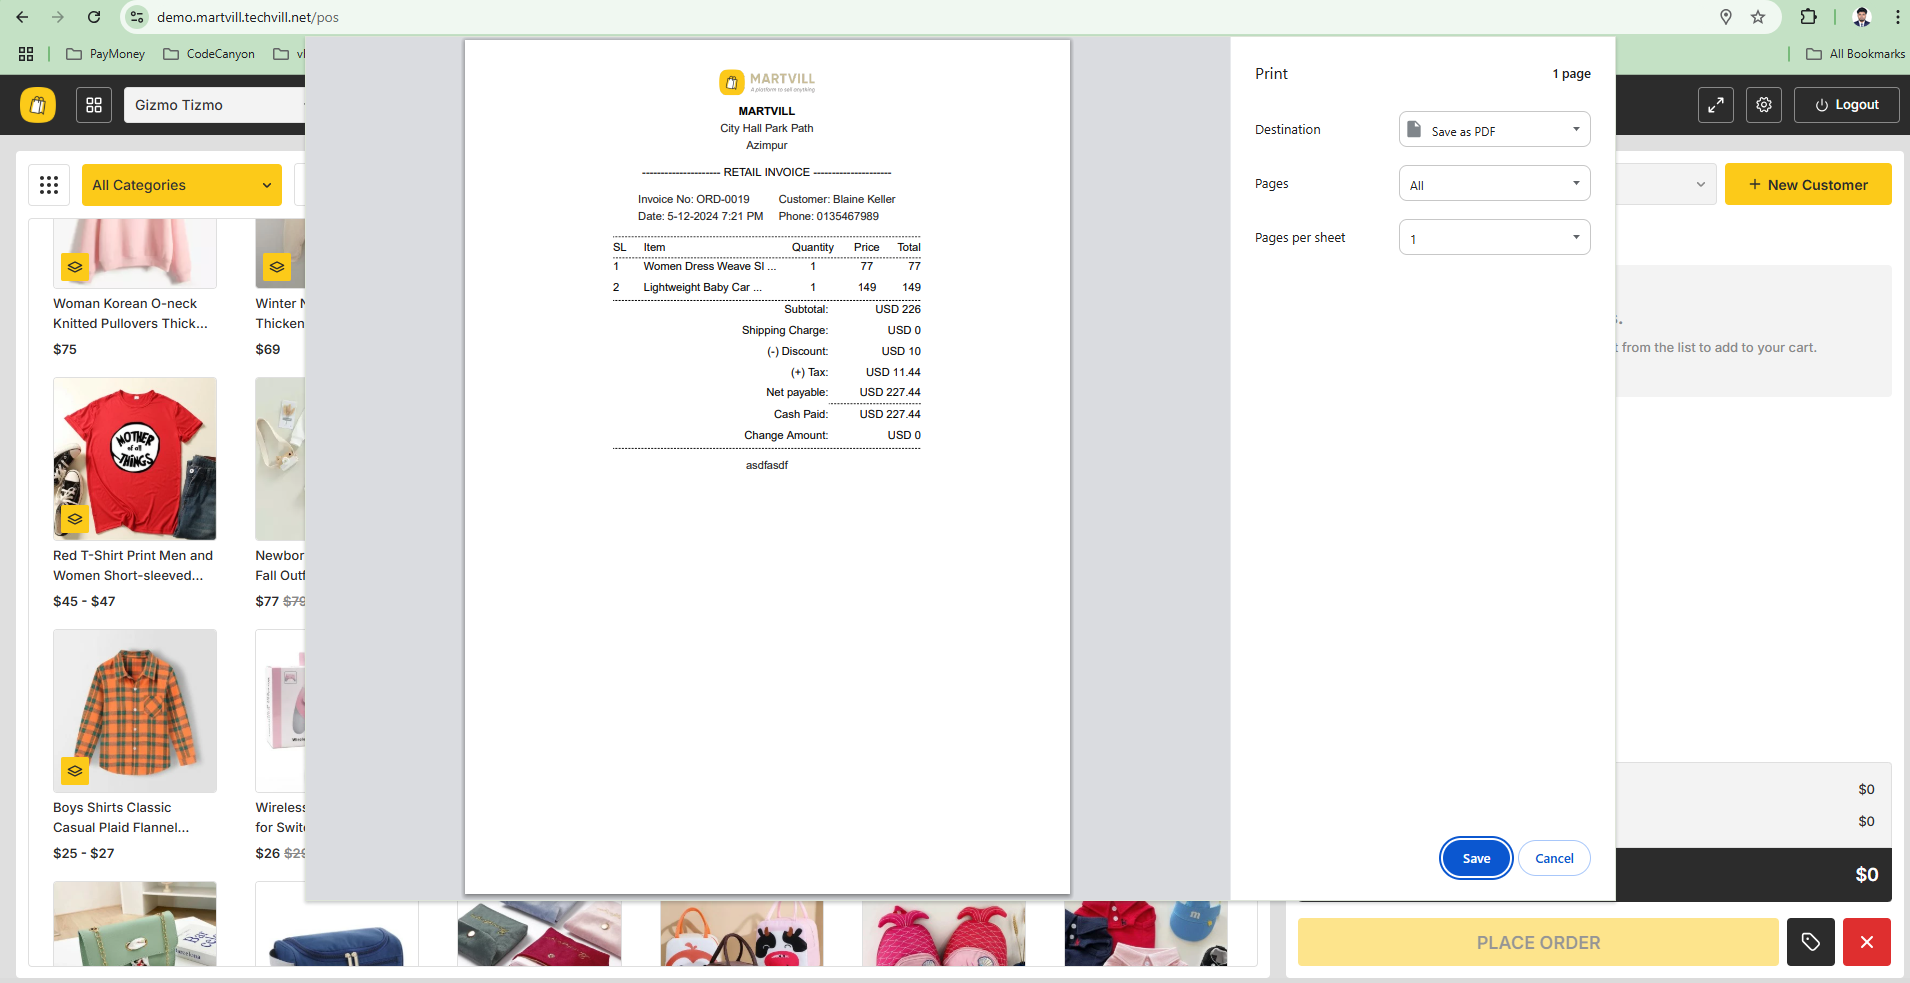
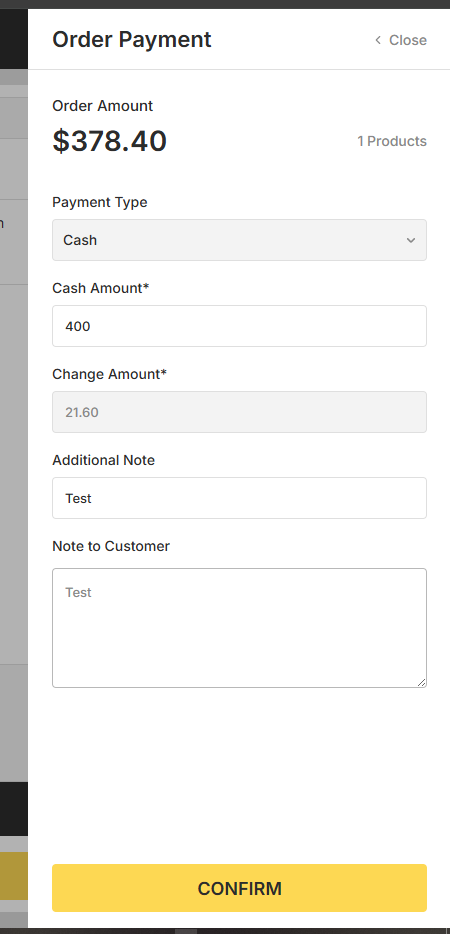
Once the cart is ready for an order, the admin has to click on the Place Order button. This will open a order details drawer where the admin will select the payment method and provide the necessary information and click on the Confirm button which will place the order and the invoice for that order will be generated. If cash is selected as a payment method and the user provides additional cash for the order then the changed amount for that order will be displayed as well.
When a vendor/staff logs in the POS panel then they will have to login through the terminal and they will not be able to change the vendor but can switch the location as per their preference. But they can only proceed with an order only through their own location. But they can view other location to check the available stocks for those location.
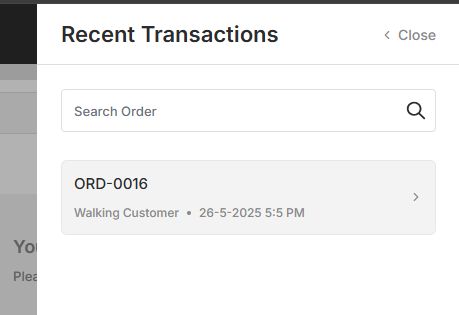
On the transaction section the admin and vendor can see the order details of all the orders that is made from that specific session. The can even filter the transaction list using keywords.
The vendor/staff/admin can even can the product view option from the POS panel by clicking on the grid/list view button or can even reset the cart by clicking on the Cross button.