Tax
One of the essential steps you take while setting up an online store is working out taxes. If calculating accurate tax calculations complying with the legal obligations of your country or local area is getting a bit complicated, don’t hesitate to get professional help. MartVill attempts to provide settings as straightforward as possible to make the process easier. Let’s go through the basic procedure to configure MartVill tax settings on your online store.
You can go to this tab by navigating through the following path:
MartVill Dashboard > Configuration > Tax.
The Tax tab looks like the screenshot below:

Tax Tab
Various tax options
Now, we will look into each setting in detail. First, you have to decide which location you are using to set up your tax form. You can select any of the three choices from the drop-down
-
Customer shipping address
-
Customer billing address
-
Shop base address
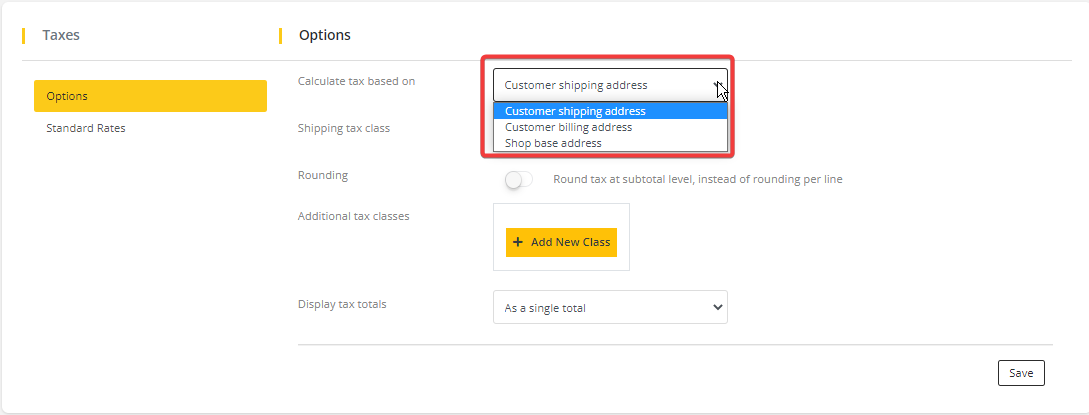
Choosing location to base tax calculation
Shipping tax class
Next setting determines how you can define Shipping Tax Class in your store. In most scenarios, shipping tax class is based on the items in the cart. That means if your customer adds a product that falls under a different tax rate, the tax for shipping will also be calculated at that same rate. You can choose the default option for this setting which is
Shipping tax class based on cart items. If your tax jurisdiction doesn’t allow for this, you can select another tax class.
You can select the appropriate option from a drop-down. If you’ve already set a customized tax class, you can see that too among the choices in the drop-down.
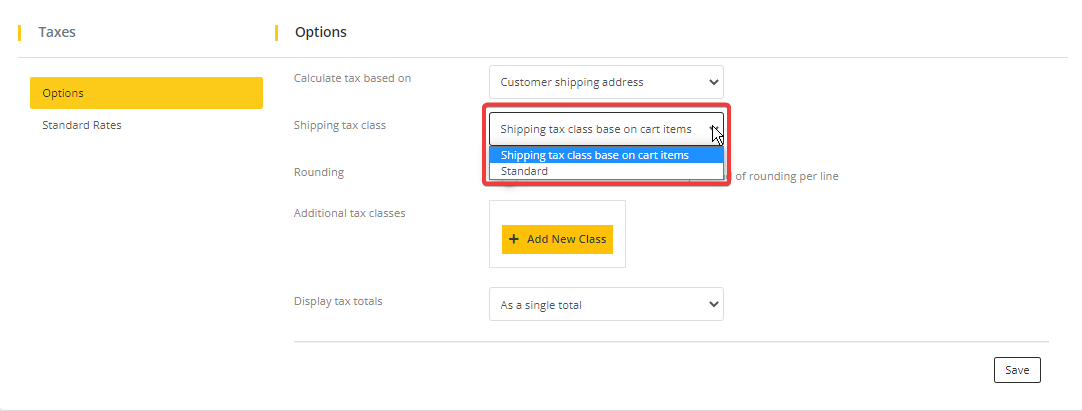
Setting shipping tax class
There is a switch that determines tax rounding in the cart. You can check the switch if you want to round tax at sub-total level rather than the default rounding per line option
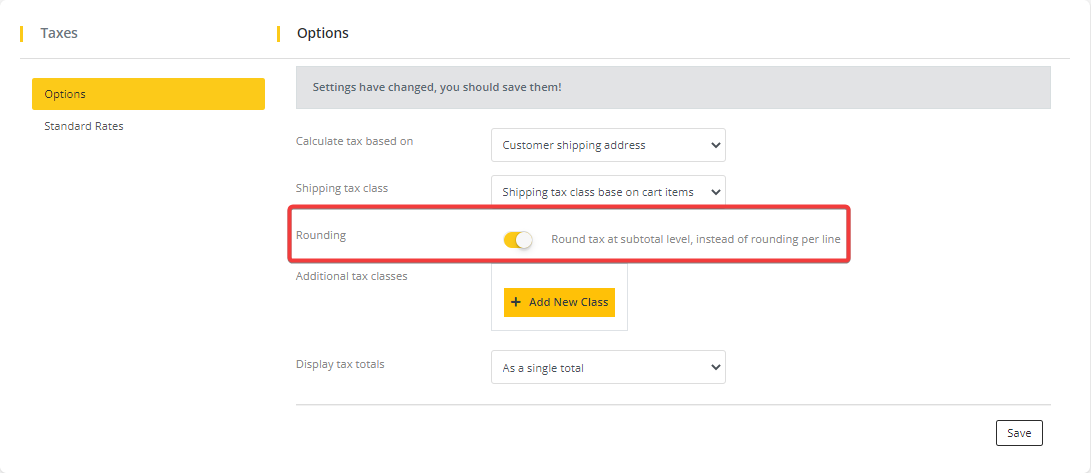
Determining tax rounding levels
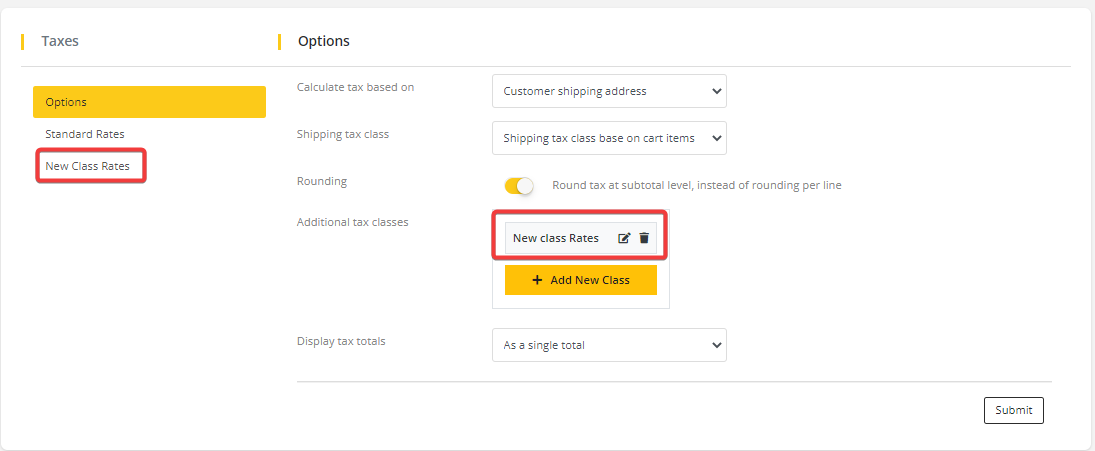
You can create additional tax classes based on your tax requirements. Apart from the default Standard Rate.
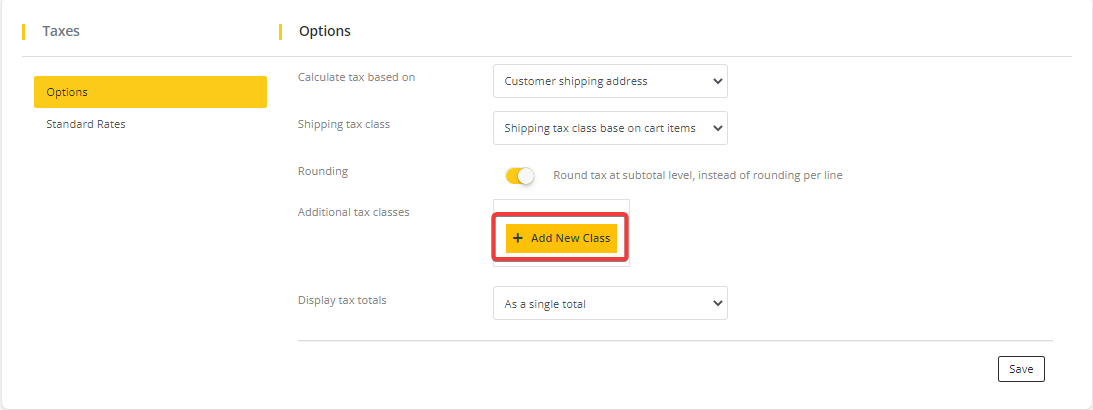
Addition tax class
To create a new tax class, enter the names and slug, after that you need to click on save button.

Add new class
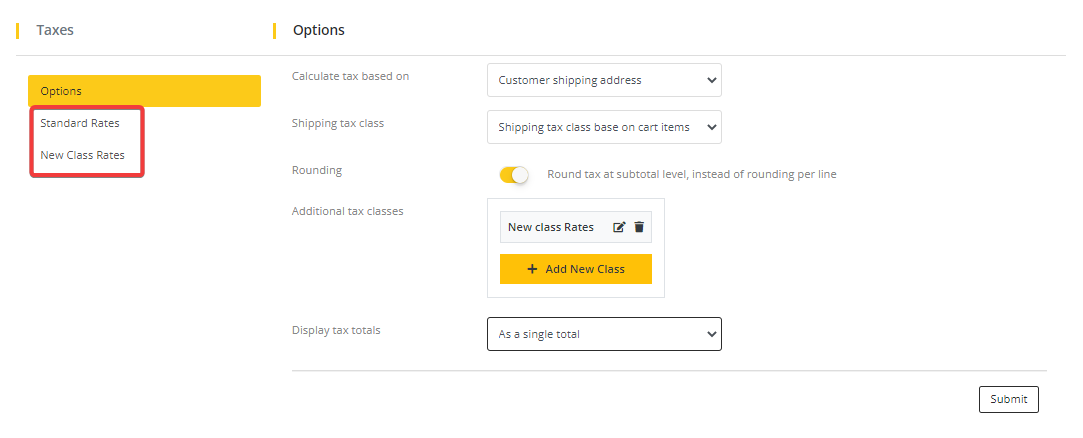
Once you create and save the new tax classes, they will be displayed as a tab on the left of the screen.
Display tax class
You can set the rate for the newly created tax class by clicking the name and entering all the required data.
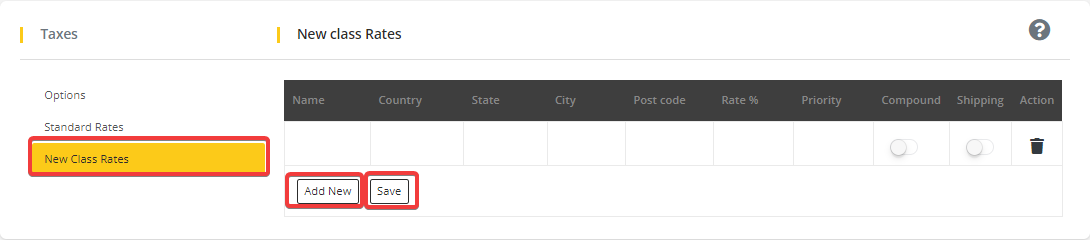
Setting rates for tax classes
Price display in store
Here you can set how to Display Tax Totals during checkout – whether to display multiple taxes clubbed together as one total or each one listed as a separate item.
You can choose ‘As a single total’ or ‘Itemized’ from the drop-down.
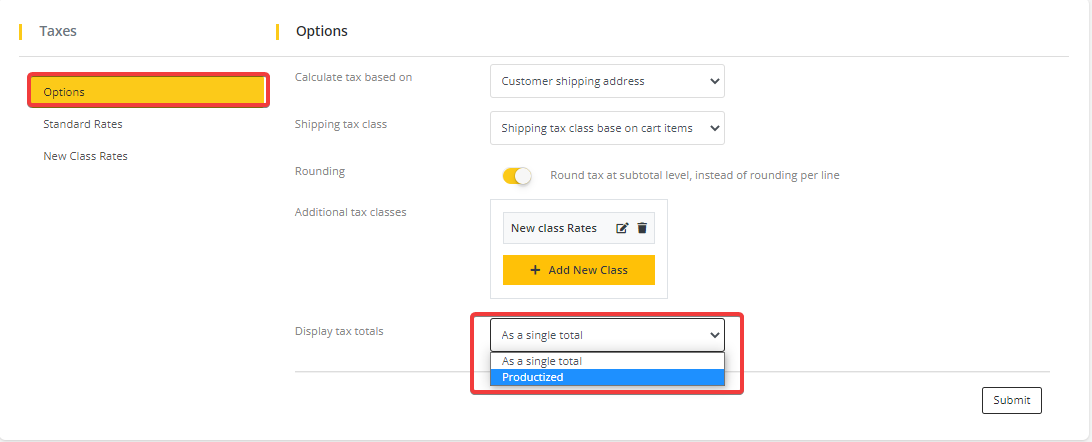
Displaying tax totals
Once you complete updating the settings, do not forget to click Submit button.
We have covered the basic tax settings in MartVill. Your tax calculations are dependent on the legal obligations of your store base and selling location. Read more about the basics of sales tax calculations before setting up taxes on your store. Read more on the topic and get professional help if required.
How to set up tax rates?
Once you are done configuring the general tax options, you can set up tax rates on your store.
All the different tax rates you set up will be visible as different tabs here. You can go to one of the rates and create different tables. For example, if you click the Standard rate, you will see the different tax rates you have set up in multiple rows. You can add or remove rows as per requirement.
Tax rate setup
Let’s see how you can set up a new tax rate. Click the Add New button to get started.
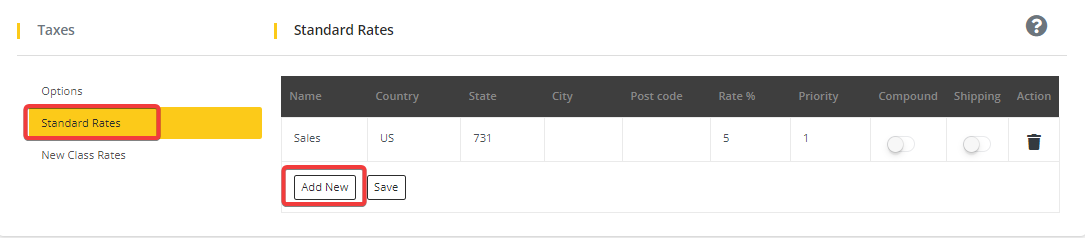
Tax rate setup
Now, you will see an additional row to define tax rate. You can start entering the relevant information as explained below:
Country code
You have to specify a 2-digit country code. You can find the ISO 3166-1 alpha-2 code for all the officially assigned countries here. If you don’t want to specify a single country, you can leave this blank.
State code
Similar to the country code, you need to enter the two-digit codes for states wherever applicable. And, if you don’t want to specify a single state, you can leave the field blank as well.
Zip / post code
This field is for the zip/post code for the tax region. There are several ways you can enter zip codes for a single region. When you are entering multiple zip codes, you can separate each with a semicolon. This field also allows wildcards and numeric ranges for post codes. For example, you can add ‘90*’ to apply the tax rates to all zip codes starting with 90. Similarly, you can provide a range like 90001…90009 to apply the tax rate to all zip codes that come within the range.
City
Next, you need to specify the city or cities where this tax rate is applicable. You can select multiple cities separated by semicolon. Just like in the other cases, you can leave the field blank to apply the rate to all the cities under a country or state.
Rate
Here is where you specify the rate of applicable tax with 4 decimal places. For example, to set a tax rate of 10%, you have to enter 10.0000 or for a rate of 12.5%, enter 12.5000.
Name
You can also enter a name for the tax rate. For example, Sales Tax, VAT, etc.
Priority
You can also choose a priority for the tax rate. You have specify only one matching rate per priority. If you are defining multiple tax rates for the same area, then you have to set a different priority for each rate.
Compound Taxes
If you want the rate you are defining to be applied on top of all the other taxes, you can tick this checkbox. Say for example, you have an additional tax on a specific jurisdiction along with the regular sales tax. The compound tax option determines whether the additional charge is calculated based on the product price alone, or including the product price as well as the regular sales tax. Checkout the specific case in the example scenario below.
Shipping
If you want this tax rate to be applicable to shipping charges, you need to select this checkbox as well. When this is checked, the tax rate will be applied on the product price and the shipping charges. When unchecked, the tax rate will be calculated based on the product price alone. Once you enter all the relevant values in all fields, you can save changes for the tax rate to apply for customers from that specified region.
Example scenarios
Here is an example scenario on how you can set up different tax rates on your store.
Suppose a store wants to set up different taxes for customers from different regions. For example, if you want to charge a tax rate of 6% across the US, you can set the tax rate as below.
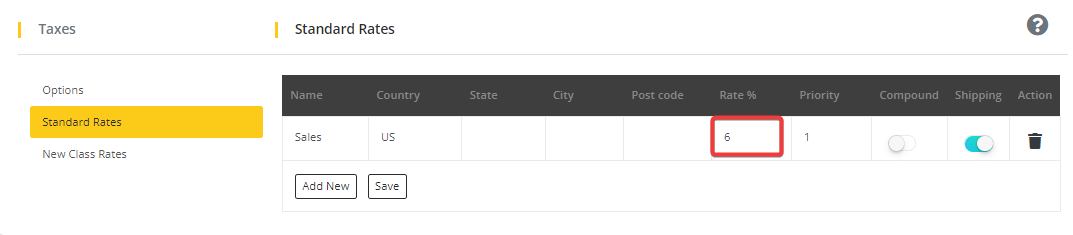
Tax rate setup
On the cart page, when a US address is entered, this tax rate is applied.
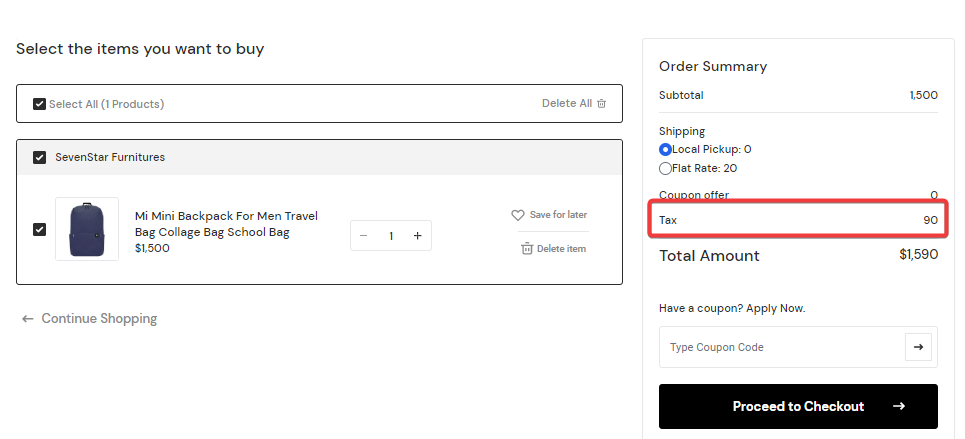
Tax rate setup
Now, let us set a different charge for one state. Say, you want to set a tax of 7.125% for Arkansas. For this, you can add an additional tax rate for Arkansas, and set it as Priority 1.
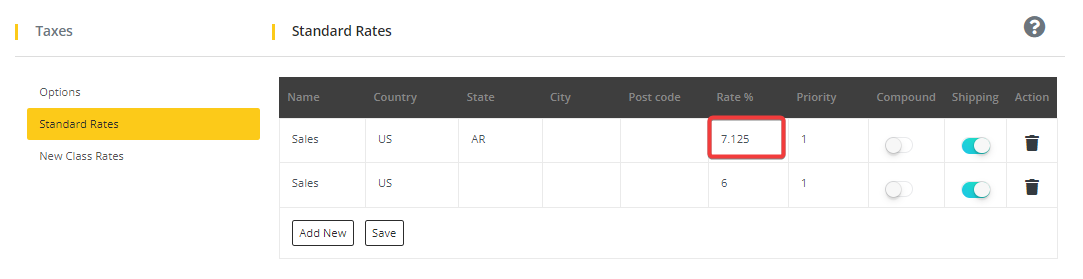
Tax rate setup
Now, when a customer enters the address as Arkansas, this rate will be applied instead of the common US rate of 6%. Customers will be able to see this on the Cart page. All Arkansas addresses will have 7.125% sales tax, and the rest of the US will be 6%.
Tax rate setup
Let us look at another example. Sometimes you might want to set up an additional tax rate only for a city or zip code. How will you manage this? Here is an example. Let’s set an additional tax rate of 2% for zip code 90001, and set it as priority 2.
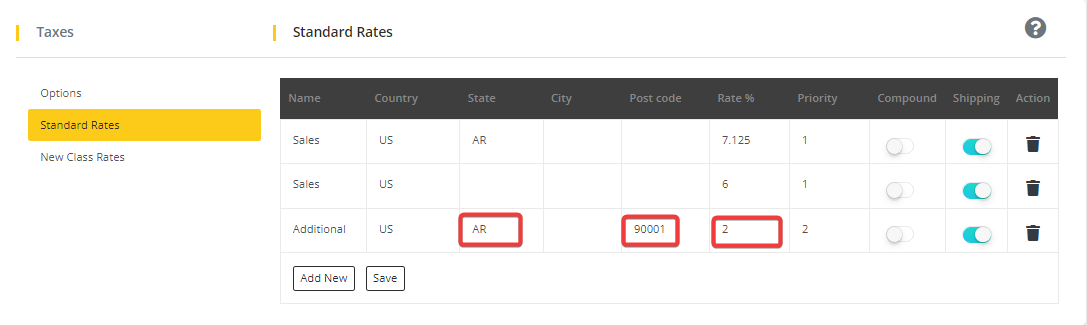
Tax rate setup
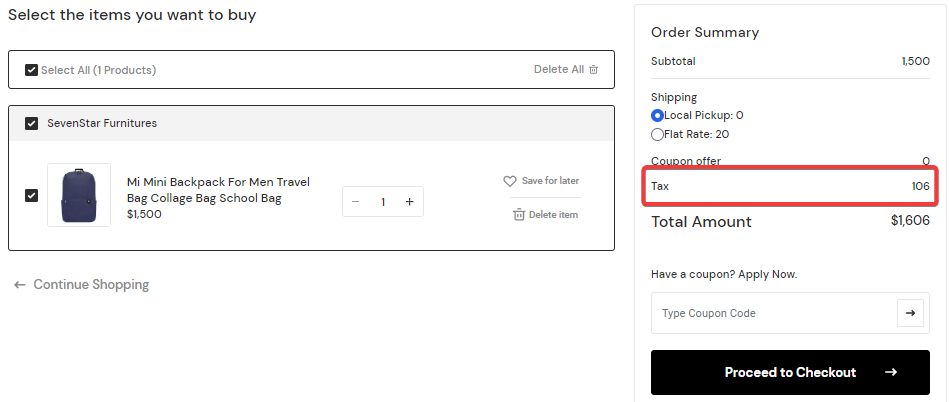
When a customer tries to checkout from entering this zip code, the additional tax (2%) will be applied along with the sales tax rate for California, which is 7.125%.
Tax rate setup
Compound tax
Now, let us try and understand how complex tax is charged.
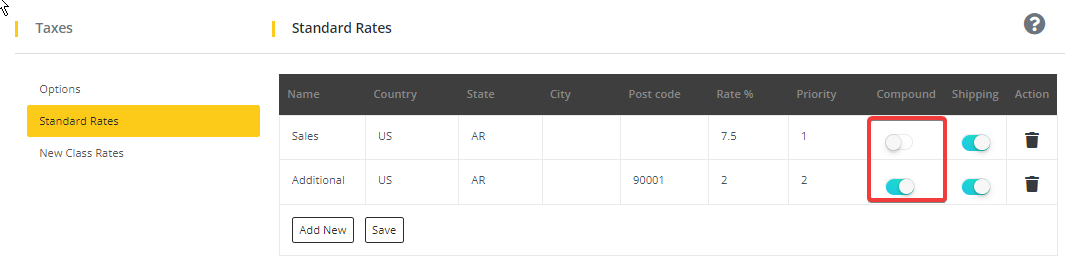
There are two taxes applicable for the zip code 90001. The regular California state tax as well as an additional 2% tax. First, we will keep the compound checkbox unticked
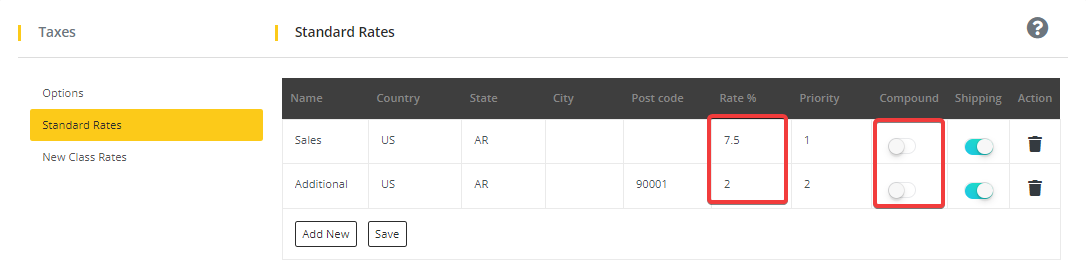
Tax rate setup
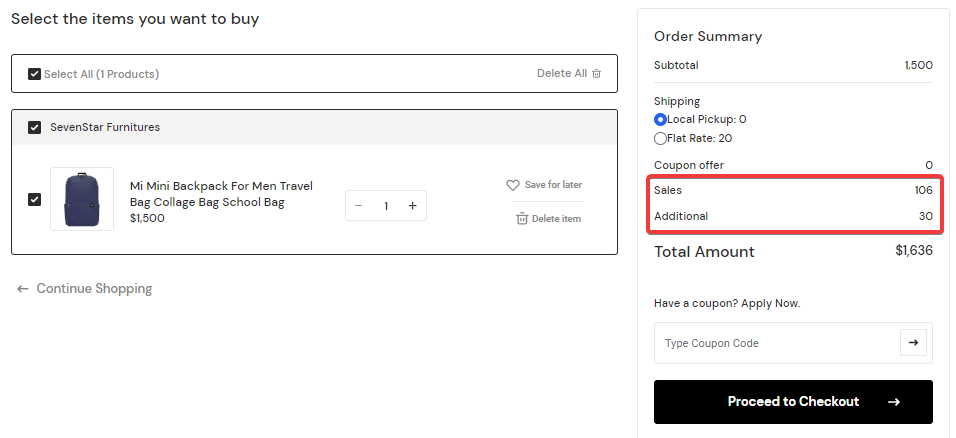
On the Cart page, both taxes will be applied individually based on the product cost. Sales tax 7.5% of $1500 ($112.5); and Additional Tax 2% of $1500 ($30)
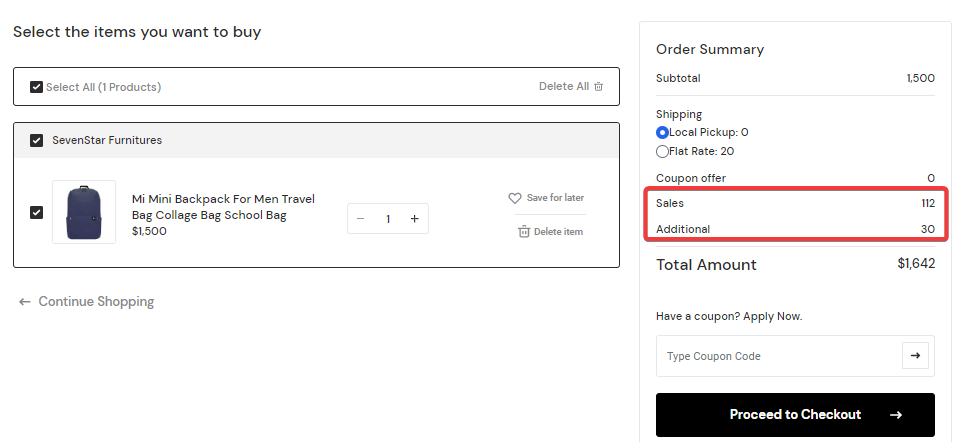
Tax rate setup
Now, let us see what happens when compound field is checked for the additional tax.
Tax rate setup
The additional tax is charged on the compound rate of product price + state tax ($1500 + $112.5) instead of only $1500, which was the case in the first example. So the taxes will be: State Tax: 7.5% of $1500 = $112.5 Additional tax: 2% of 1612.5 = $32.25
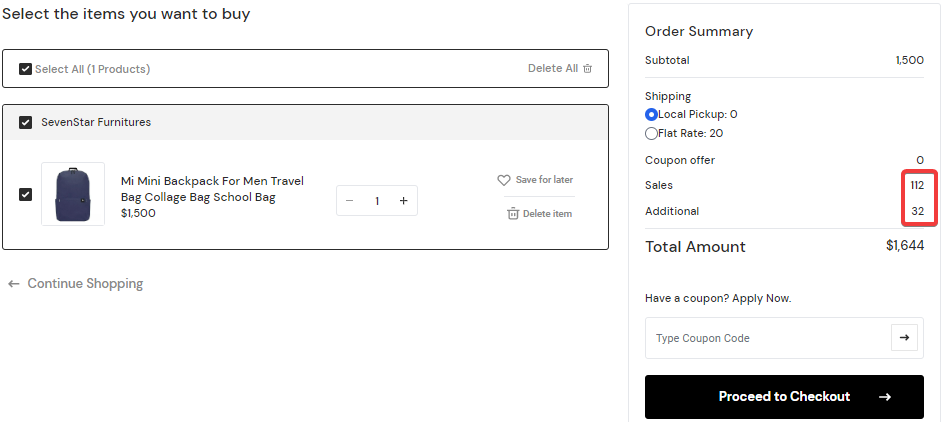
Tax rate setup
Tax on Shipping
Here is an example to demonstrate how tax on shipping will be applied. In the below example, we will set up New York state tax without tax applied on shipping.
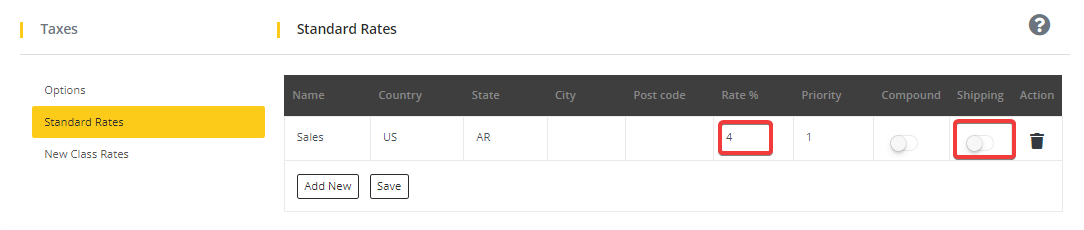
Tax rate setup
When a customer from New York adds a product to cart, the tax is applied only on the product price ($1500) and not on the shipping cost ($10). That means the tax is only $60 (4% of $1500).
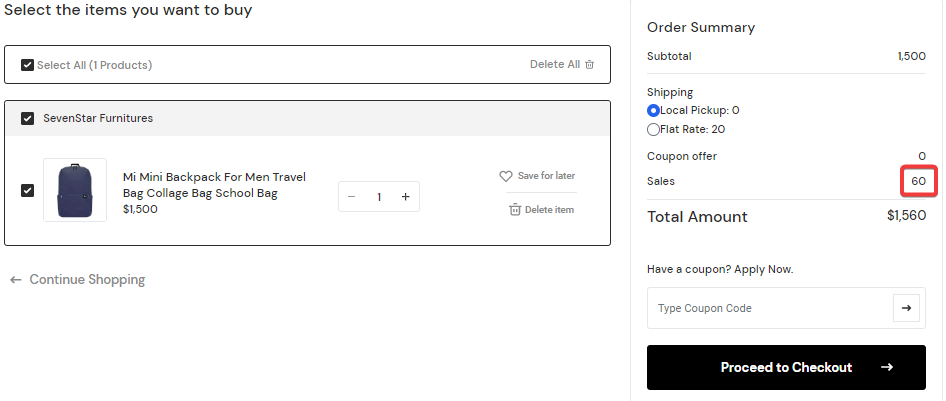
Tax rate setup
Now we will tick the checkbox for tax on shipping.
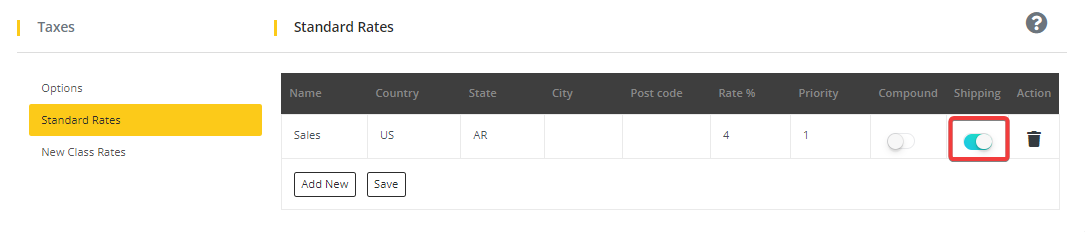
Tax rate setup
On the cart, the rate will also change accordingly.
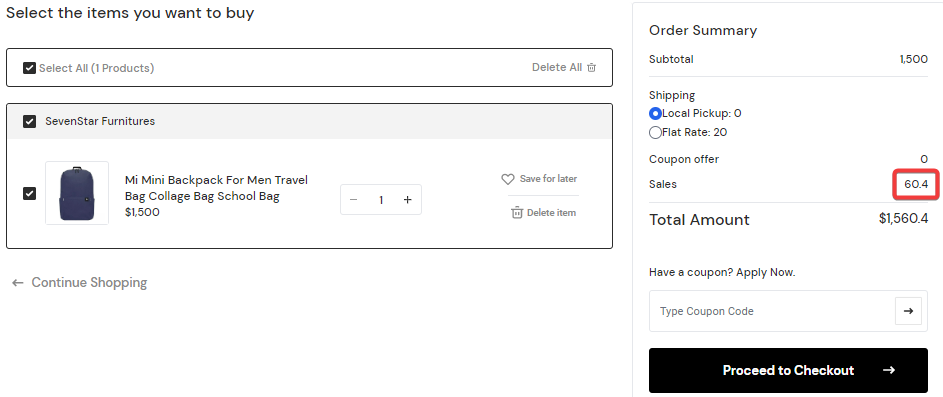
Tax rate setup
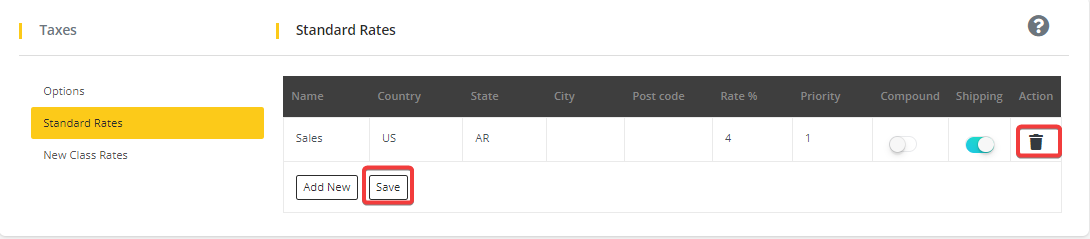
How to delete tax rates?
Sometimes you will need to delete certain tax rates from your store. Let us see how you can do this when you have a range of tax rates already defined on your store.
To delete a tax rate, you can simply click on delete icon to delete tax rate. After that you need to click on save button.
Tax rate setup
Determining tax compliance for eCommerce businesses
Determining the actual tax amount to be collected is always a headache for eCommerce store owners. It is not easy for eCommerce merchants as it is for traditional merchants because customers in an online transaction can be anywhere in the world. A lot of governments in the world are taking initiatives to collect taxes depending on the location of the consumer. Gaining knowledge on each of applicable taxes and accordingly collecting tax can be a tiring matter for eCommerce merchants.
United States
Several states in the US has economic threshold that requires eCommerce merchants with annual transactions above a certain value, to collect and pay sales tax. Certain states even charge taxes on SaaS-based products as well.
Canada
Quebec in Canada too have such an economic threshold that mandates eCommerce merchants to pay state tax if their business exceeds a certain amount.
European Union
eCommerce businesses who sell to countries in the European Union needs to collect VAT applicable to the particular country. For every invoice you make for European Union citizens, you have to apply, collect and remit applicable tax.
India
All digital transactions to Indian customers are bound by 18% GST. There is no economic threshold here. If you are selling to a consumer in India, you have to register and collect GST. However, this is not applicable in B2B transactions as the buyer is bound by the tax compliance.
Japan
Japan has an annual threshold for digital merchants to collect taxes when they sell to Japanese consumers. All those merchants who sell to Japanese customers above the threshold will have to collect taxes.
Different countries will have different tax rules as seen in the above cases. Checkout the Quaderno article that discusses some of the updated tax rules in various countries. You have to keep yourself updated to changing rules and regulations to correctly collect and remit taxes.