Tickets
Tickets are created, when vendor faces any problem or has any questions in any where in the system. Admin can also add tickets on any issues and assign other sub-admin to solve the issue.
Vendor Tickets
- Go To MartVill Vendor Dashboard > Tickets from sidebar. To add new ticket Click on Add Ticket.
- A form will appear to create the ticket.
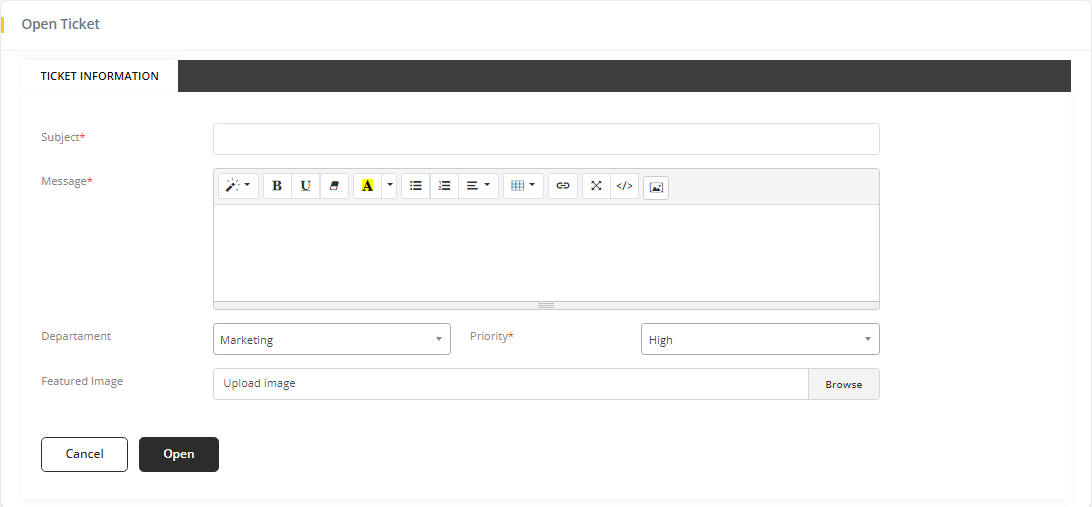
- Enter a Subject. It works as title of the ticket.
- Explain your issue or questions in the Message text box.
- Select the Department for the ticket. Marketing, Sales and Technical department are available.
- Select Priority, high, low or medium based on importance of your ticket.
- If needed, upload images on Featured Image field.
- Click on Open to save the ticket. Admin will receive an email that a ticket is created.
Vendor Reply to ticket
- When a ticket is created, Vendor can reply to the ticket. To view the details of the ticket by clicking on the ticket Subject from ticket list.
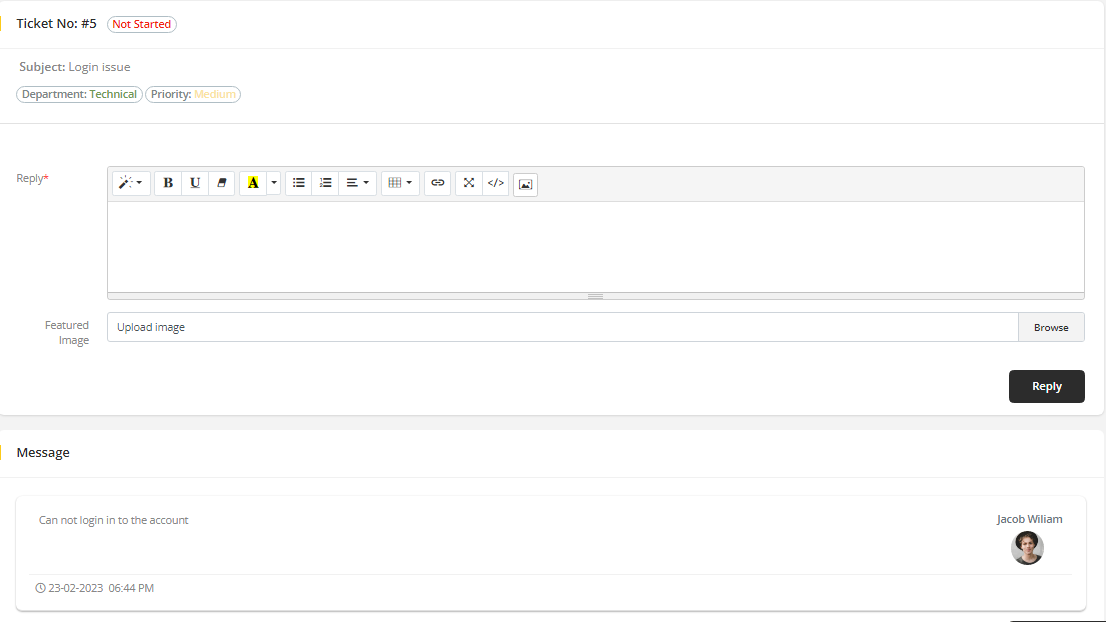
- Vendor can reply to the ticket and add images to the ticket. Click on Reply and the reply will be sent.
Once vendor created or reply the ticket, he will not be able to edit or delete it.
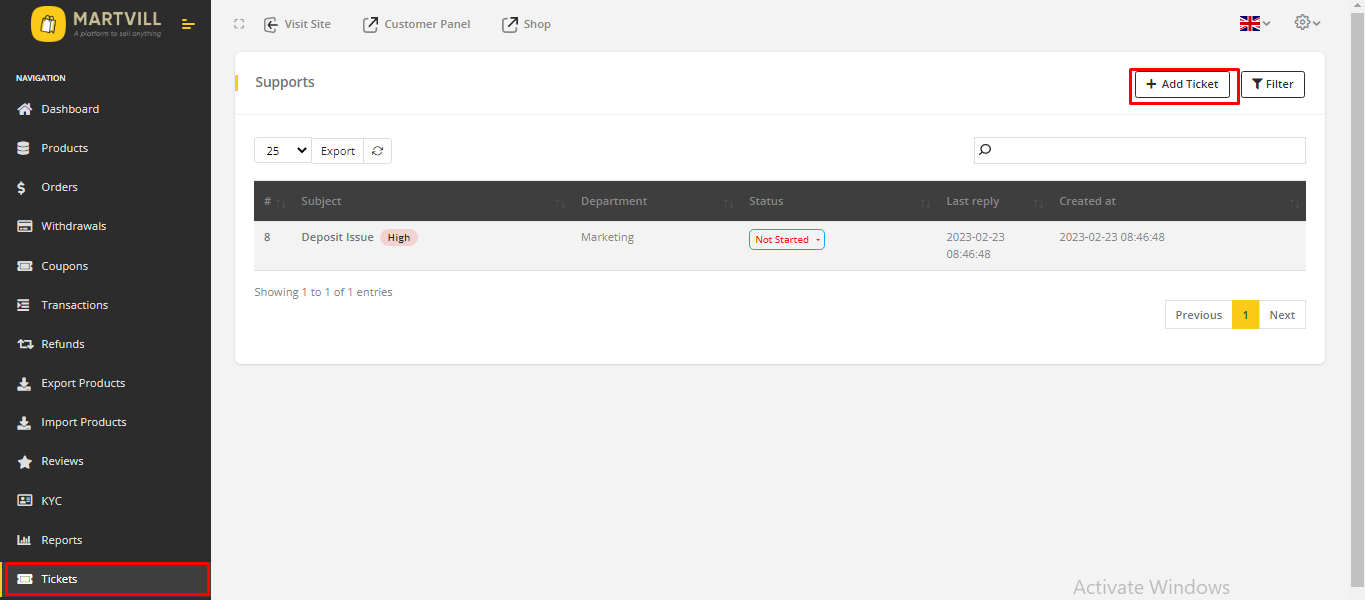
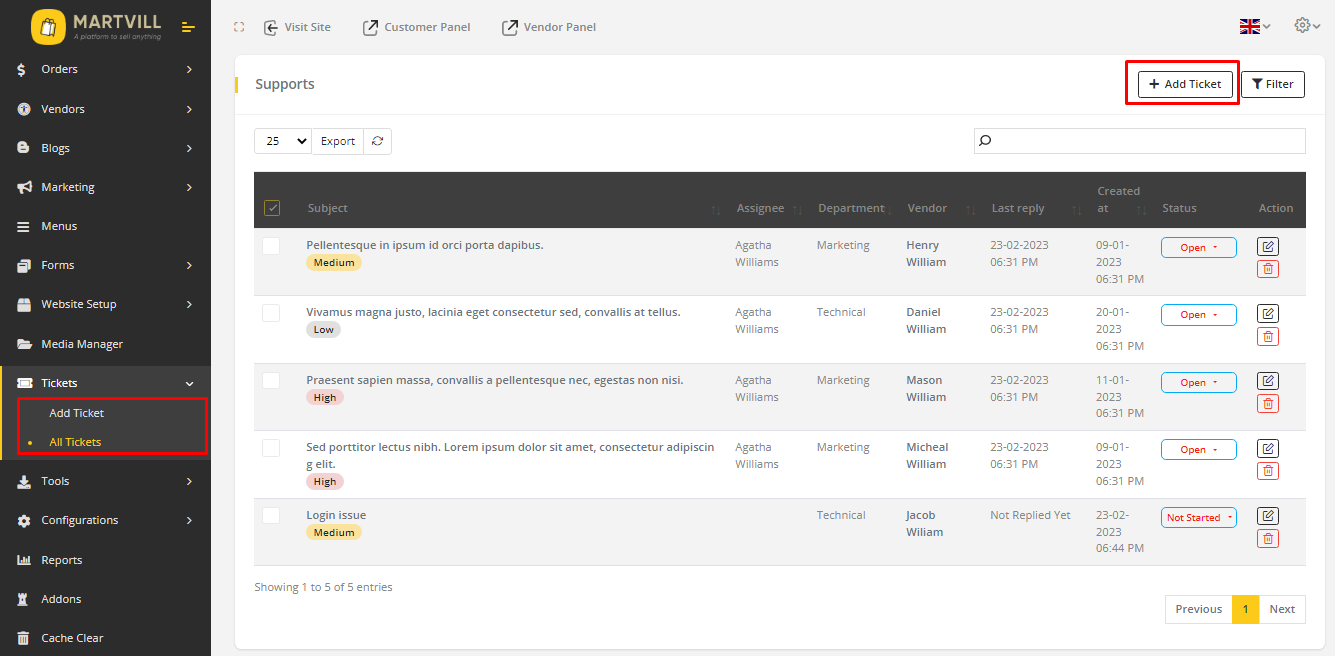
Admin Tickets
- Go to MartVill Dashboard > Tickets > Add Tickets or MartVill Dashboard > Tickets > All Tickets > Add Ticket
- A form will appear to create the ticket.
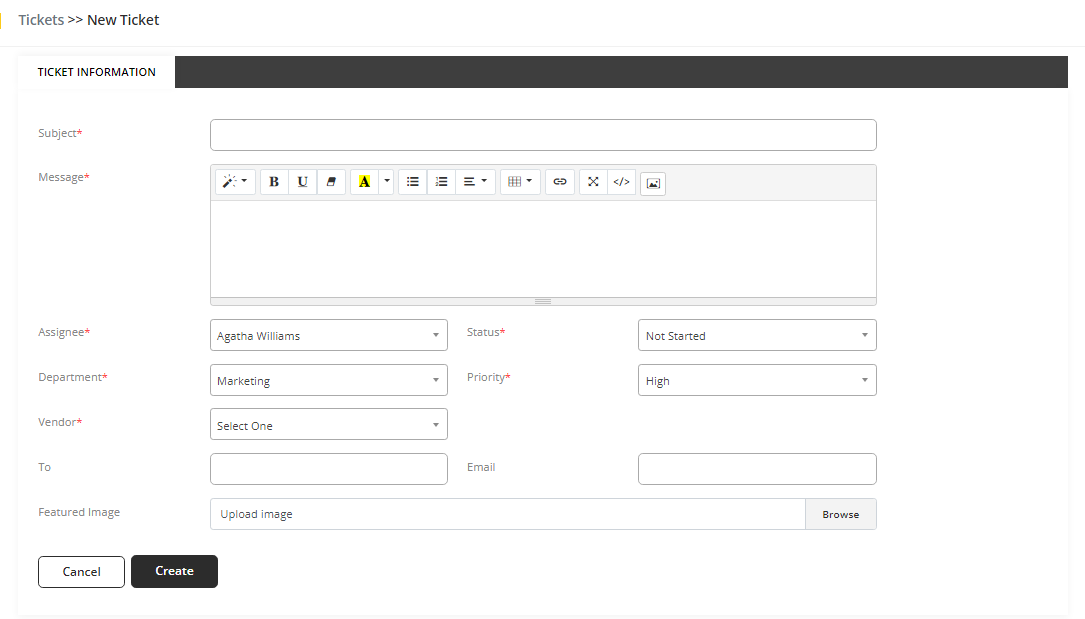
- Enter a Subject. It works as title of the ticket.
- Explain your issue or questions in the Message text box.
- Select Assignee from dropdown options. Assignee should be Admins or Sub-admins.
- Select Status for the ticket.
- Select the Department for the ticket. Marketing, Sales and Technical department are available.
- Select Priority, high, low or medium based on importance of your ticket.
- Add the Vendor who is related to the ticket. Email and To field will automatically completed when Vendor is added.
- If needed, upload images on Featured Image field.
- Click on Created to save the ticket. Assignee and Vendor will receive an Email regarding the ticket creation.
Admin Reply to Tickets
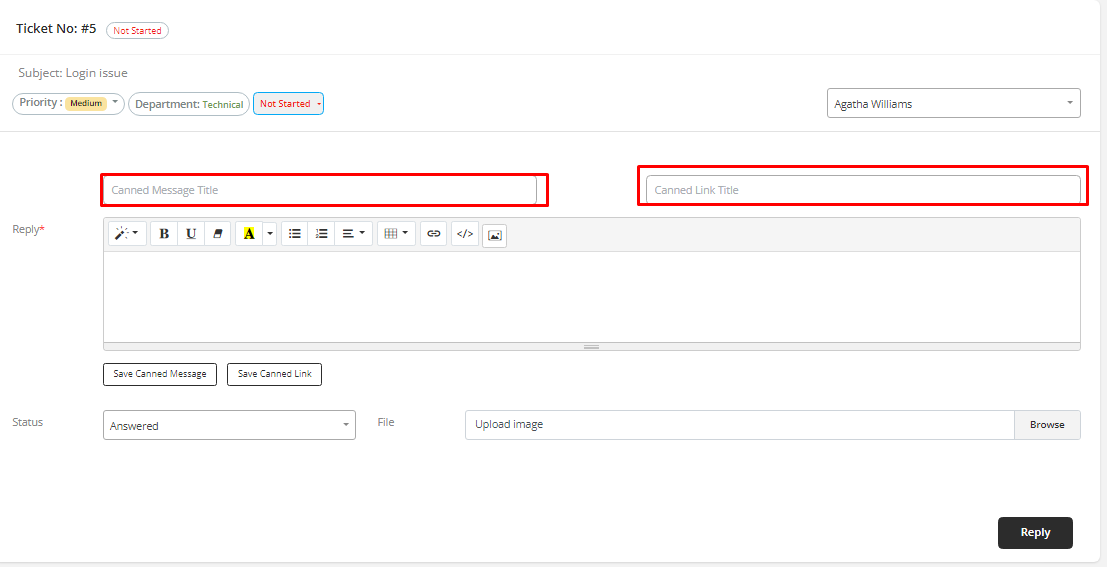
- When a ticket is created, Admin can reply to the ticket. To view the details of the ticket by clicking on the ticket Subject from ticket list.
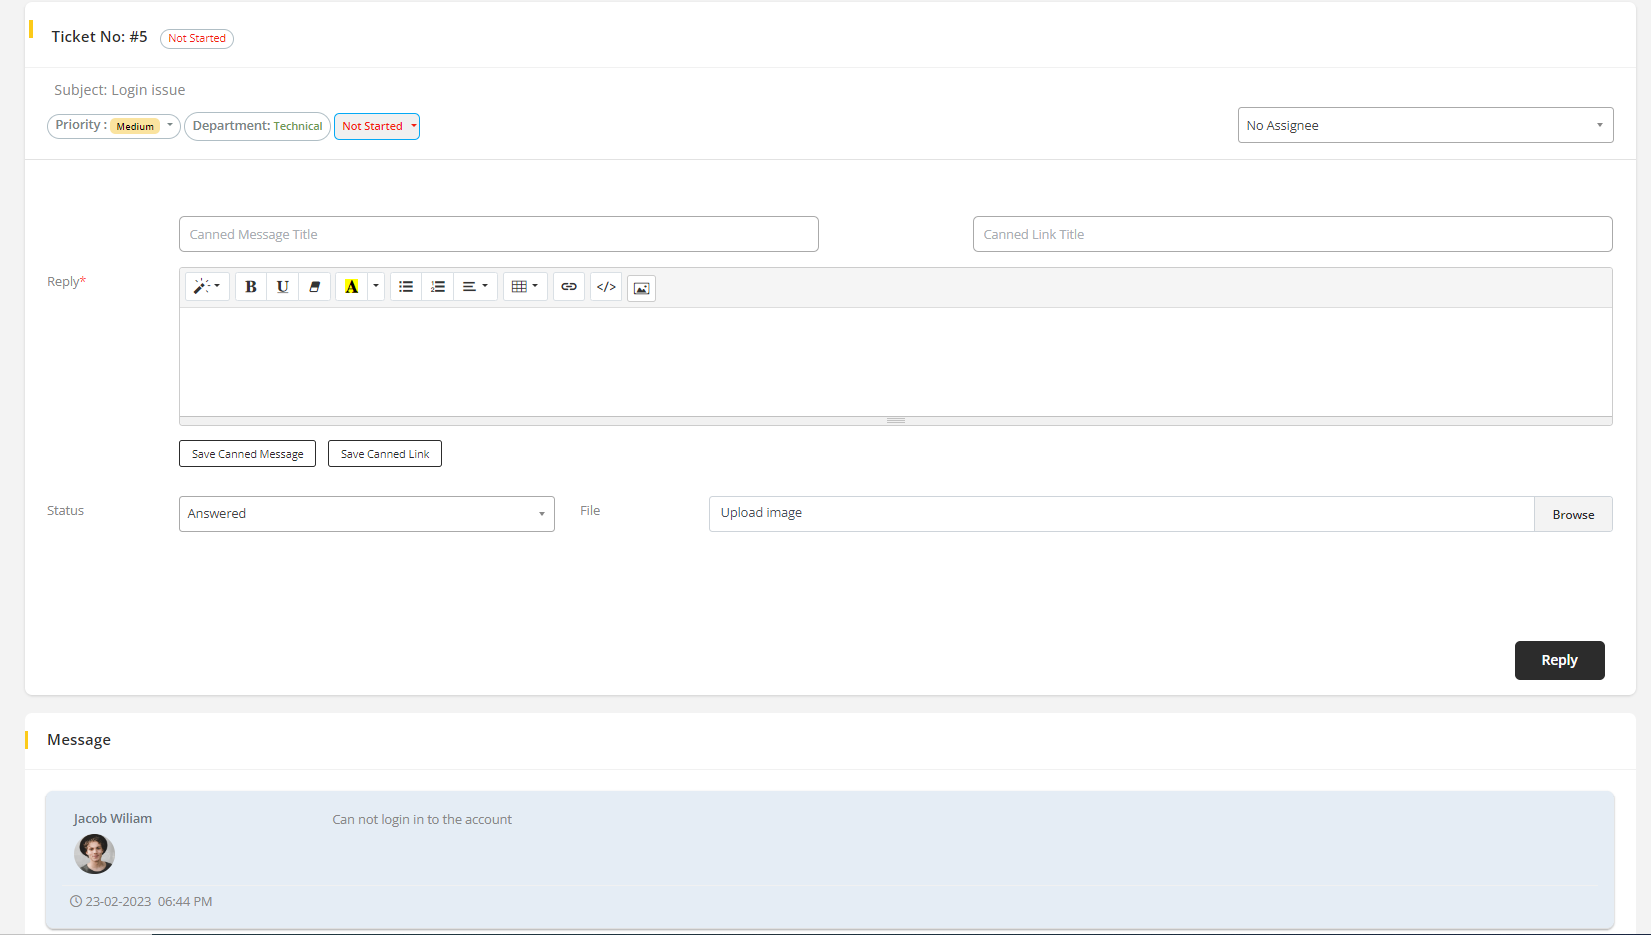
- Status and Priority can be changed from this reply page.
- Admin can reply in reply box and That reply can be Saved for later use. To save the reply, enter a title in the Canned Message Title and if you want to save a link from the reply, enter a title to Canned Link Title.
-
Click on Save Canned Message to save the message and Save Canned Link to save the link.
-
Add images if you needed.
- Clink on Reply. The reply will be sent.
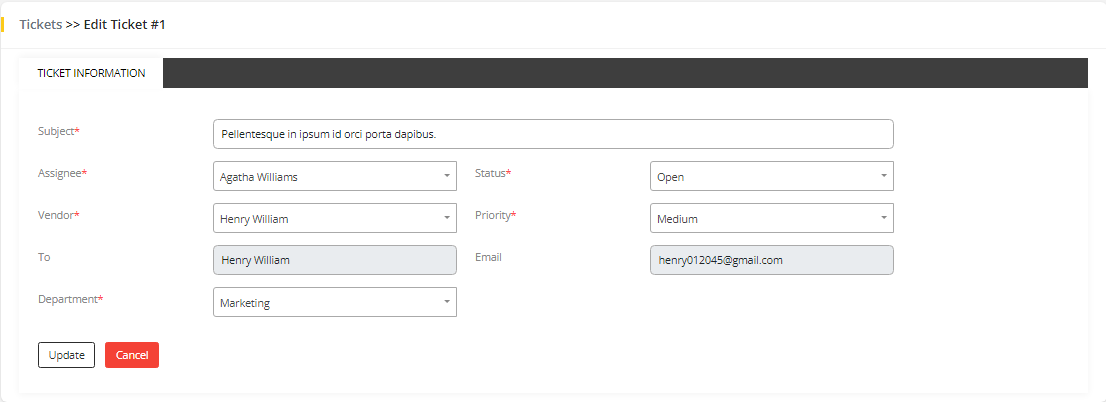
Editing Tickets
- To edit the ticket information, Click on View icon from the ticket list.
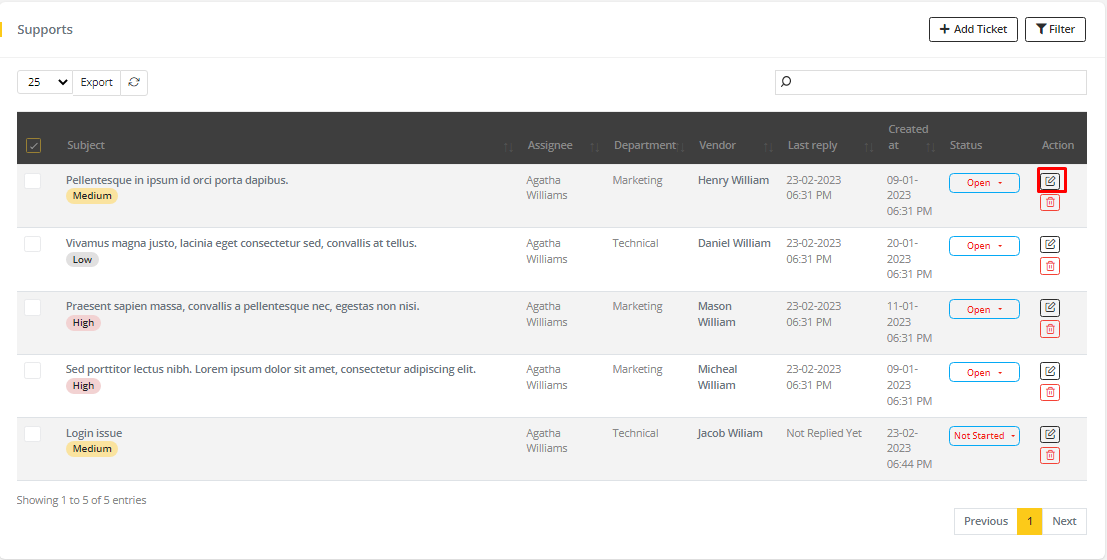
- Admin can edit Subject, Priority, Status, Assignee, Department and Vendor. Update the changes by clicking on Update
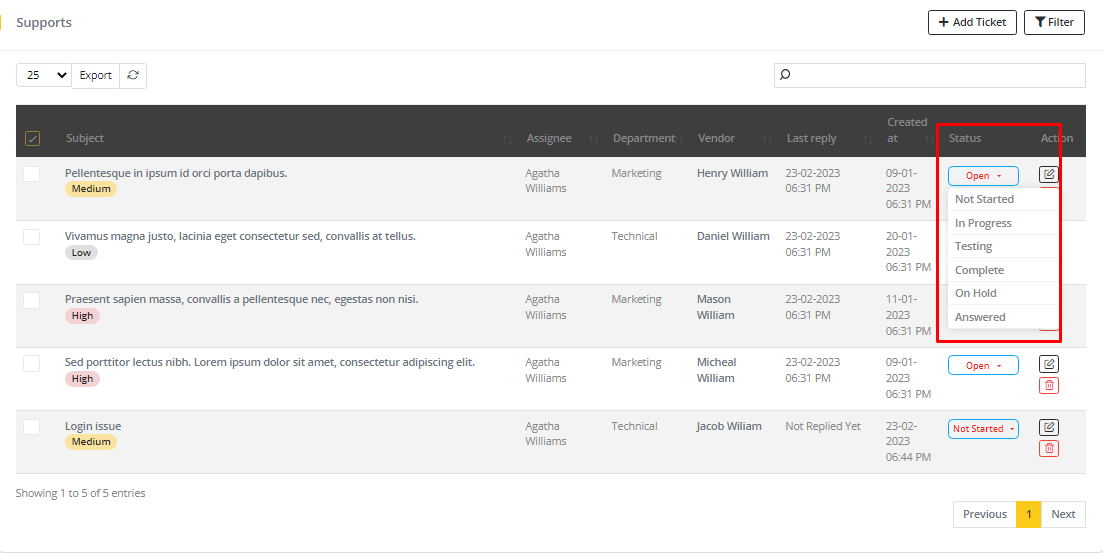
- Admin can also change the Status from the Ticket List.
Admin can edit his reply and messages and admin can also delete ticket.