Variable Product
With MartVill's variable products, you can provide a variety of product variations while maintaining control over the price, stock, image, and other aspects of each variation. They can be utilized for a product such as a shirt, where you can offer a large, medium, and small, as well as in various colors.
Adding Variable Product
Set up Product Type
To add a variable product, create a new product or edit an existing one.
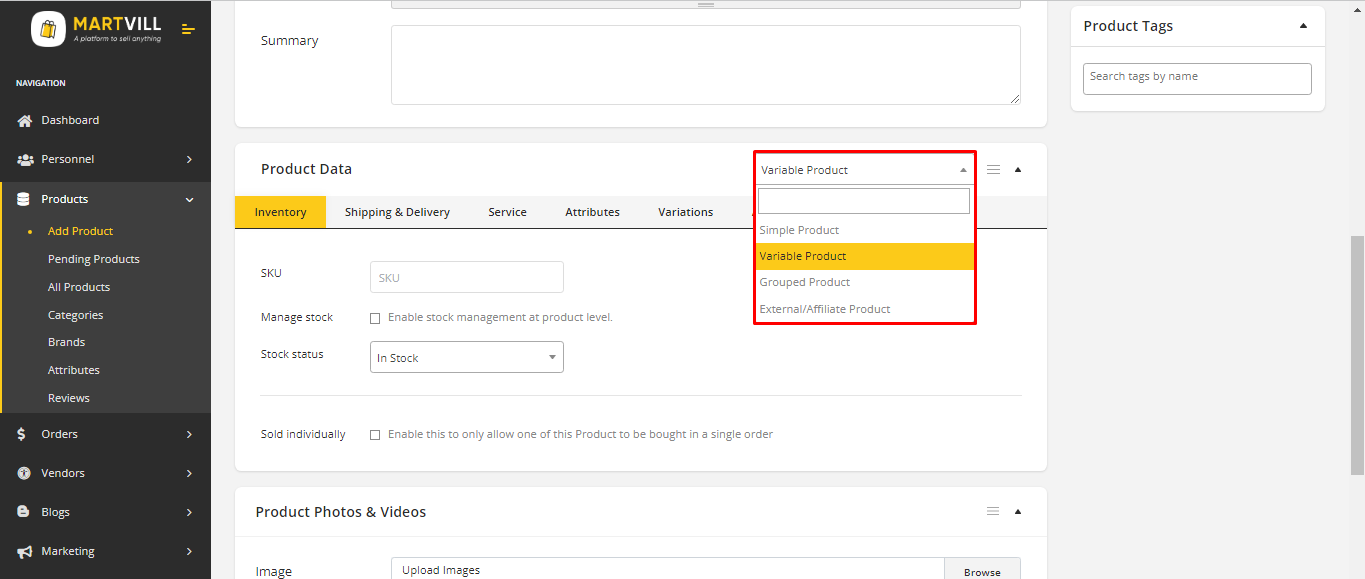
- Go to: MartVill Dashboard > Products
- Select the Add Product button or Edit an existing product. The Product Data displays.
- Select Variable product from the Product Data.
Adding Attributes to Use for Variation
In Attribute section, add attributes before creating variations. Global and Custom Attribute can be added to the product and they will be used as variations.
See Simple Product's Attribute section to add Global or Custom Attribute to the product.
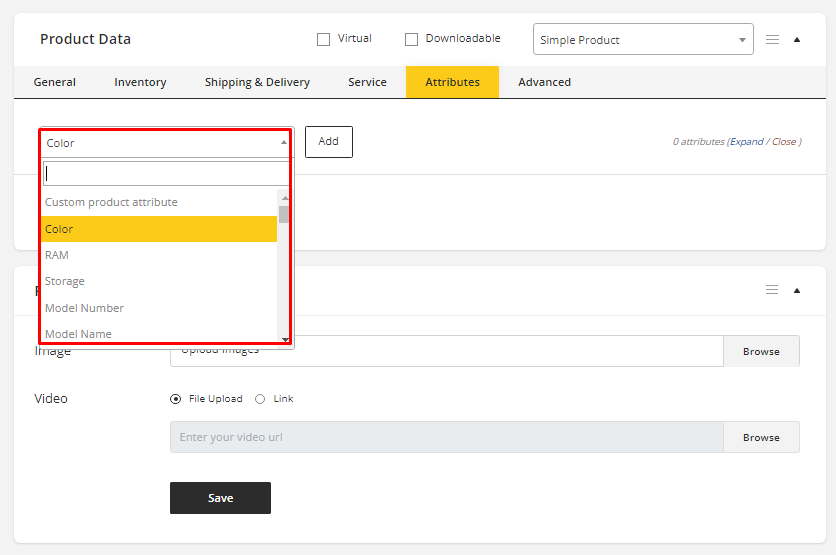 Choosing an Attribute
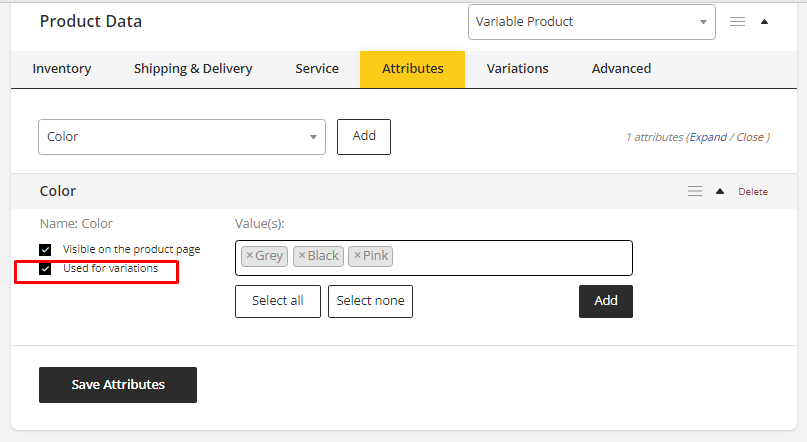
To use the Attribute as Variation, you need to Enable Used for variations checkbox. And Save the attribute.
After adding an attribute the Attribute Options section will be appered where the admin or vendor can change the attrbute value as well as the color code of the attribute and also the shape of how it should appear on the product description page. And for non color attribute no such options should appear.
Add Variations
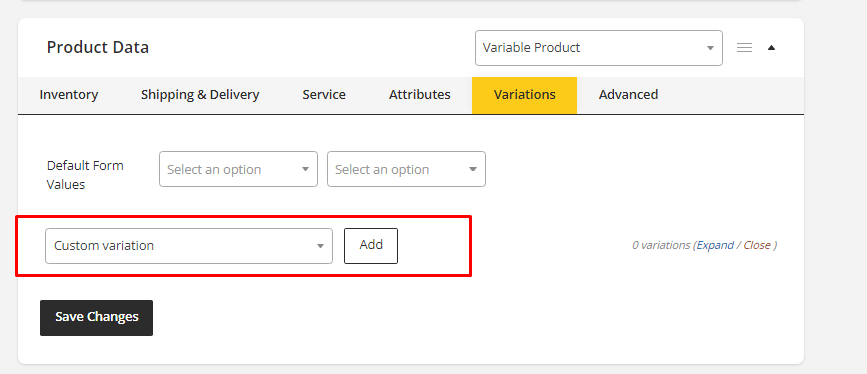
Go to the Variations section in the Product data meta box once the attributes have been created and saved to add a variation.
Setting Default Variations
On variations, set your preferred defaults. Users can choose any color and size right away from the product page because no default values were set.

Select the default form values if you want a specific variation to be pre-selected when a user accesses the product page. In this case, the Add to Cart button will automatically appear on pages for variable products.
Once at least one variation has been generated, you can only set defaults.
Adding a Custom Variation
- Select Custom Variation from the dropdown menu, and click Add.
- Select attributes for your variation. To change additional data, click the triangle icon to expand the variation.
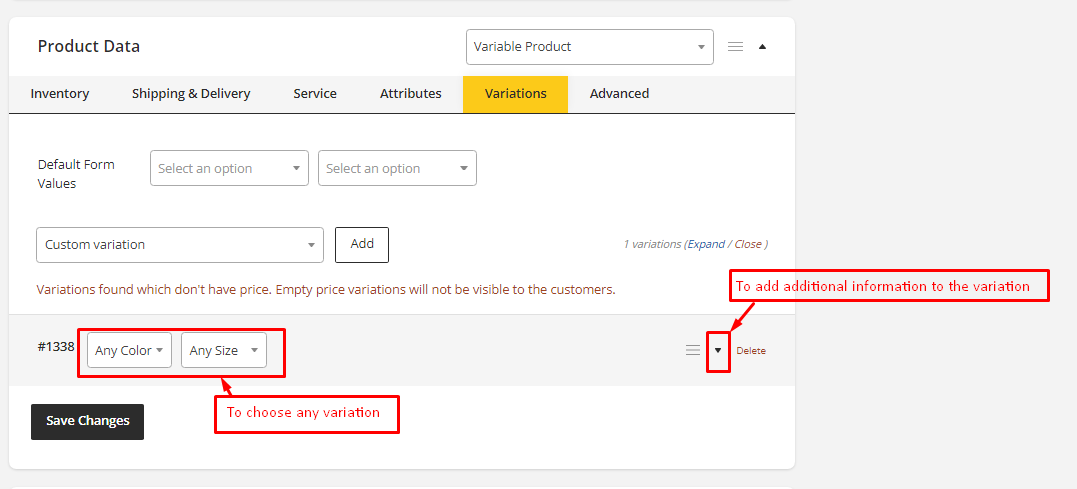
- Edit any available data. The only required field is Regular Price. Select Save changes.
Adding All Possible Variations
To generate every possible combination of variations from your attributes and their values, select All Possible Variations from all attributes and click Add.
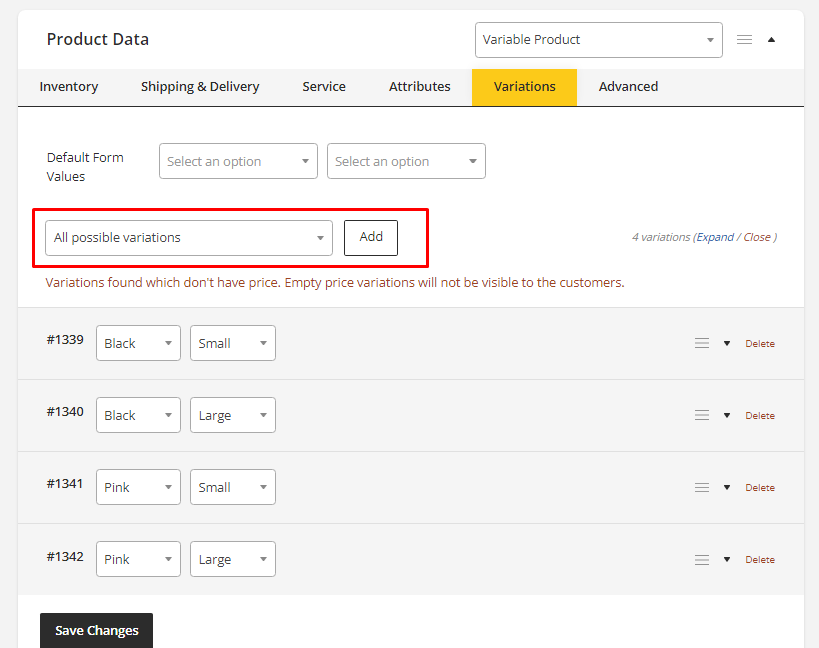 For each and every possible combination of variation attributes, a new variation will be produced. For instance, if you have two attributes, size(with values large and small) and color(with values blue and green) it creates the following variations:
- Large Blue
- Large Green
- Small Blue
- Small Green
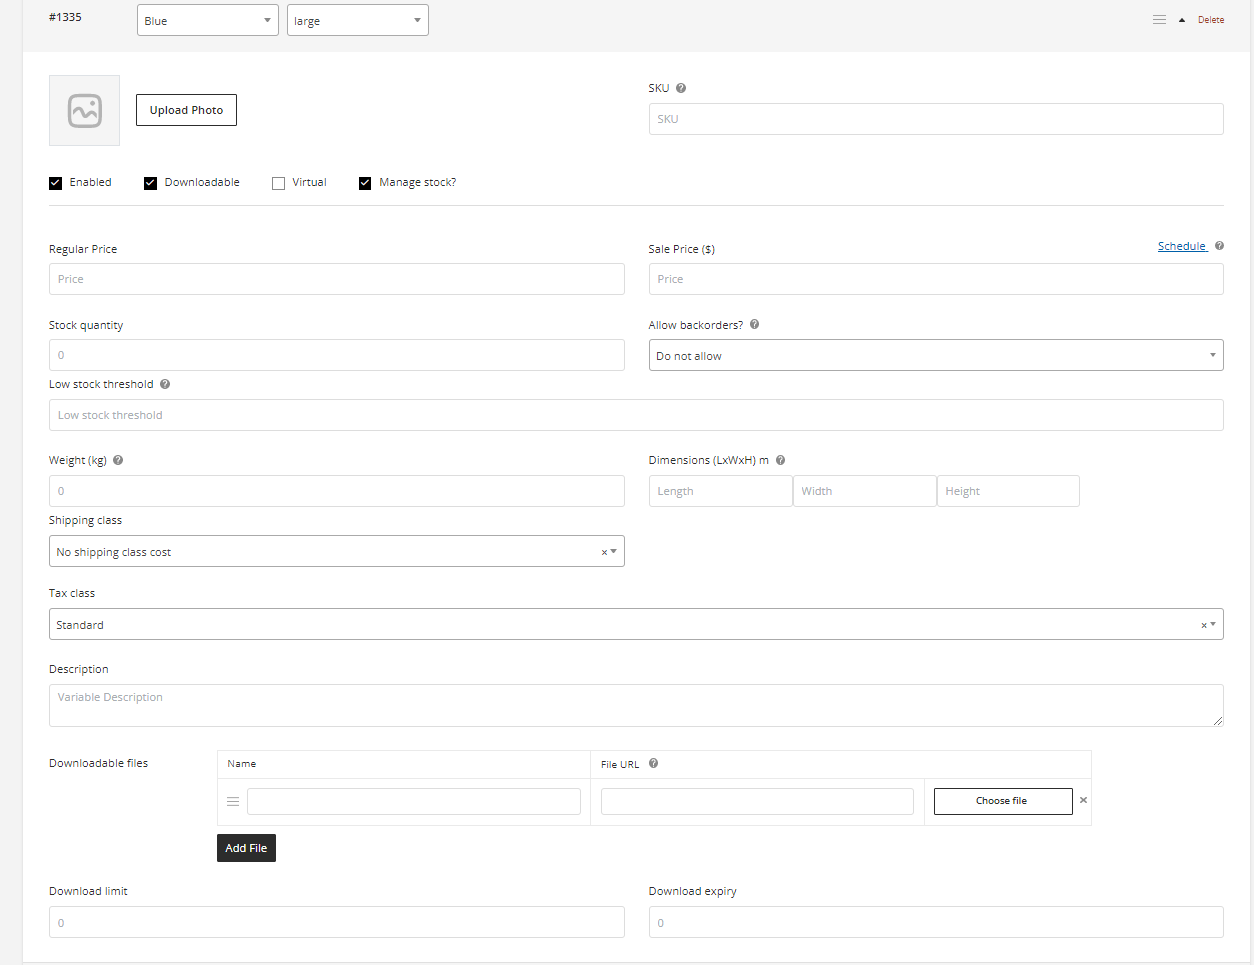
Adding Variation Data
Each variation can have the following properties.
General
- Enabled – Enable or disable the variation.
- Downloadable – select this, if this is a downloadable variation.
- Virtual – select this if product isn’t physical a product.
- Manage Stock - Inventory will be managed for this variation.
- Regular Price (required) – Set the regular price for this variation.
- Sale Price (optional) – Set a sale price for this variation with sale schedule.
- Tax class – This variation's tax class. Useful if you are providing variants that cover various tax rates.
- Weight - Set weight of this variation.
- Dimensions - Set dimensions of this variation.
- Shipping Class - Choose which shipping class should be applied to this variation. Shipping classes are used by certain shipping methods.
- Stock quantity – allows you to specify the variation's current stock level when Manage stock is chosen.
- Allow backorders – Sets whether backorders for the variation are permitted when Manage Stock is enabled; if enabled, stock can fall below zero.
- Low stock threshold – You will receive an email notification when the stock for the variation reaches this level.
- Downloadable Files – Give customers the option to download a file when Downloadable is selected.
- Download Limit – Set how many times a customer can download the file(s) when Downloadable is selected.
- Download Expiry – Set the time frame(in days) within which a downloaded file remains active after being purchasedÂ
- Description - Enter a description of this variation of the product.
Inventory Management
Inventory can be managed on product and variation level.
By selecting Enable Management Stock on the Inventory tab, you can decide how to manage stock at the product level:
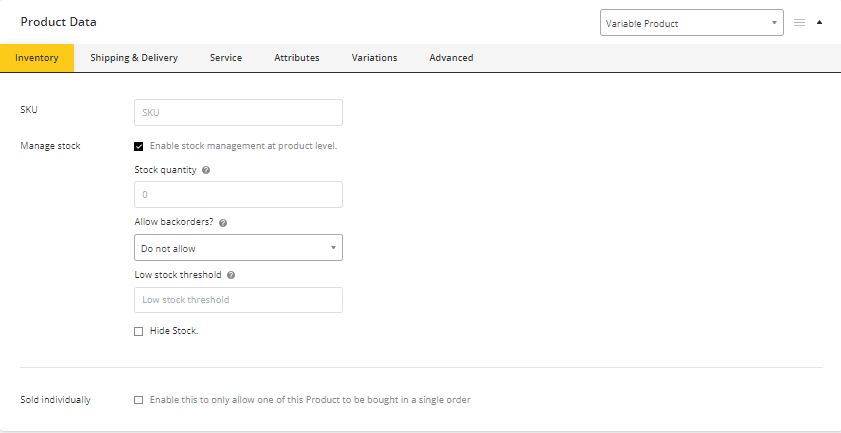
The following settings are available if you choose to manage stock on a product level:

- SKU – leave blank if you want to use the product’s SKU or set the SKU on the variation .
- Manage Stock – Tick the box on the variation to manage stock at the variation level.
- Stock Quantity – Enter the quantity to manage stock for the specific variation, or left blank to use the product’s stock settings.
- Allow Backorders – Choose how to handle backorders.
- Low stock threshold – When the stock for the variation reaches this level you will get a notification email.
- Sold Individually – Allow only one to be sold in one order. (For the product itself, this setting is used. A particular variation cannot be restricted to sell one per order.)
- Stock Status – Shows if Manage stock is disabled at product level. It can be applied to all variations at once to In stock or Out of stock. (This setting is used for the product itself)
Shipping
- Weight – Weight for the variation, or to use the product’s weight, left blank on variation.
- Dimensions – Height, width and length for the variation, or to use the product’s dimensions, left blank on variation.
- Shipping class – Shipping depends on its shipping class. If it differs from the product, change this to variant.
- Cash on Delivery - Tick the box if the product is available for cash on delivery. It will be applied to all variations. (This setting is used for the product level only).
Add Image to Variation
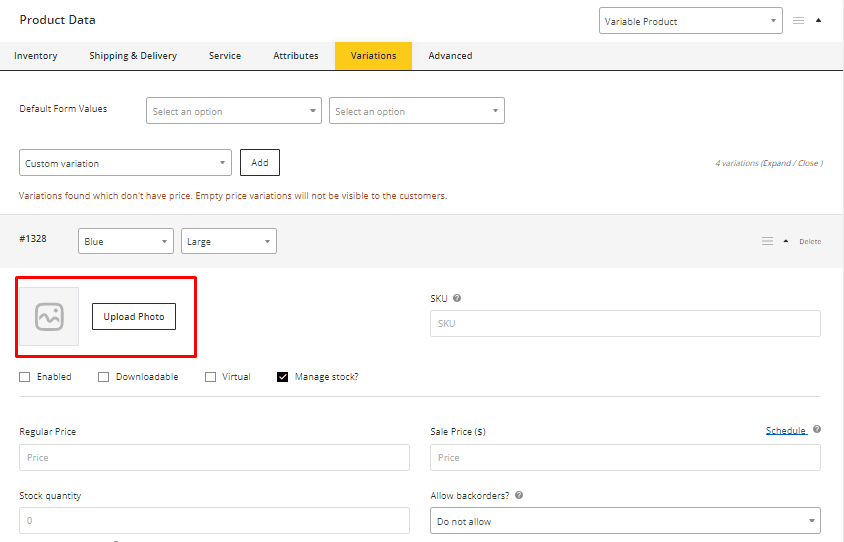
- Expand the variation.
- Click on Upload Photo.
- Select the image you want to use.
- Save all the information of the variations by clicking Save Changes.
What Customer see
The user is presented with dropdown boxes to choose variation options when viewing variable products on the frontend. By choosing an option, it will reveal more information about the variation, including the price and stock.
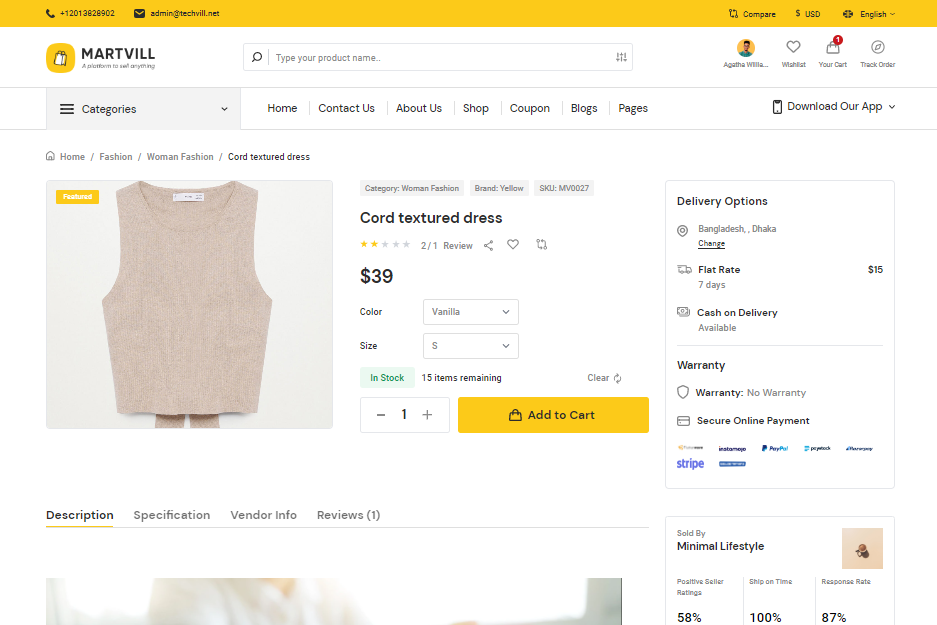
If the user tries to add the product to the cart without selecting a variation then a message will appear asking them to select some attributes.
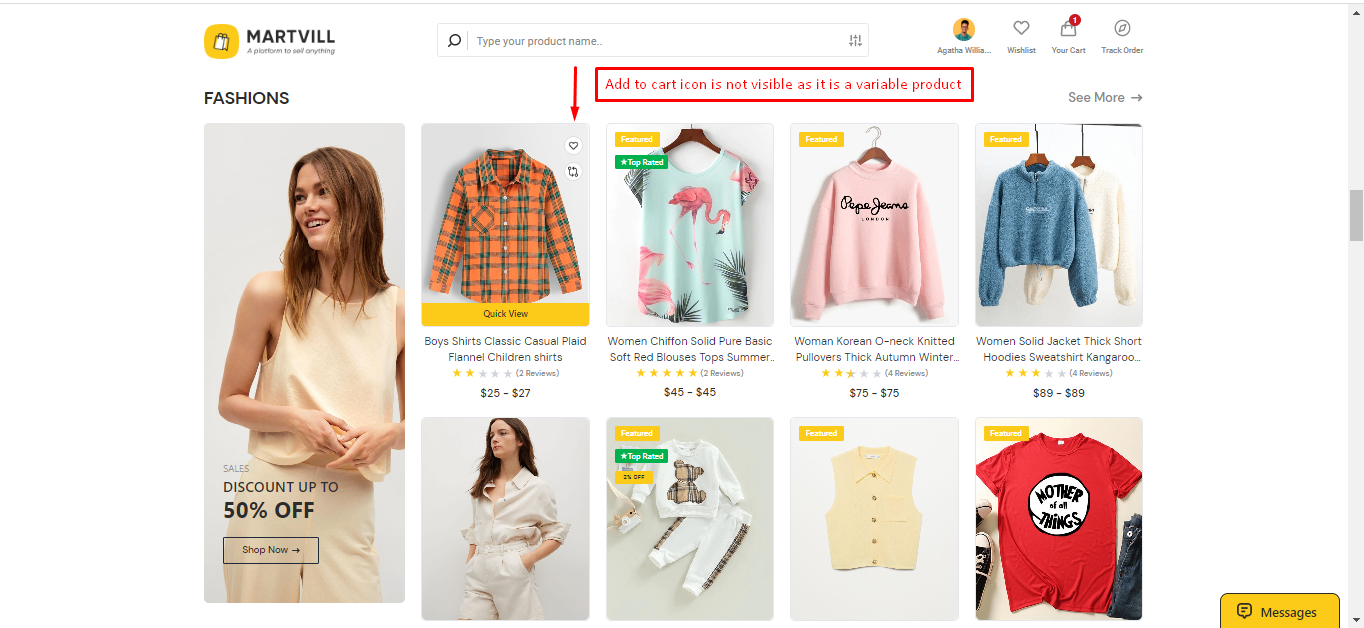
In the homepage or other page, Add to Cart icon does not display when hovering over a product because a variation must be chosen before adding the variation to the cart.